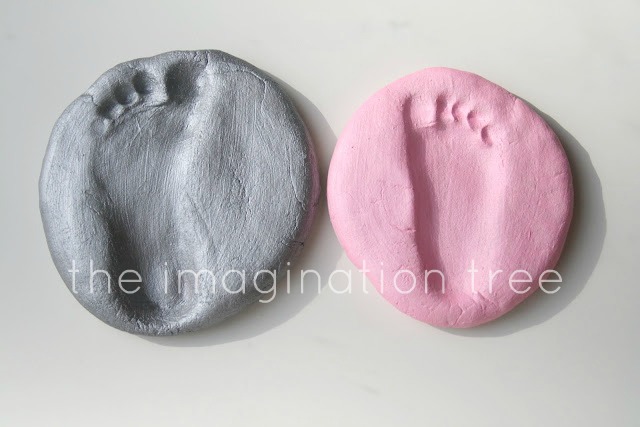
These little footprints were very easy and very cheap to make and will make perfect keepsake gifts for daddy this Father’s day!
Salt dough recipe:
1 cup salt
1 cup plain flour
Half a cup of warm water
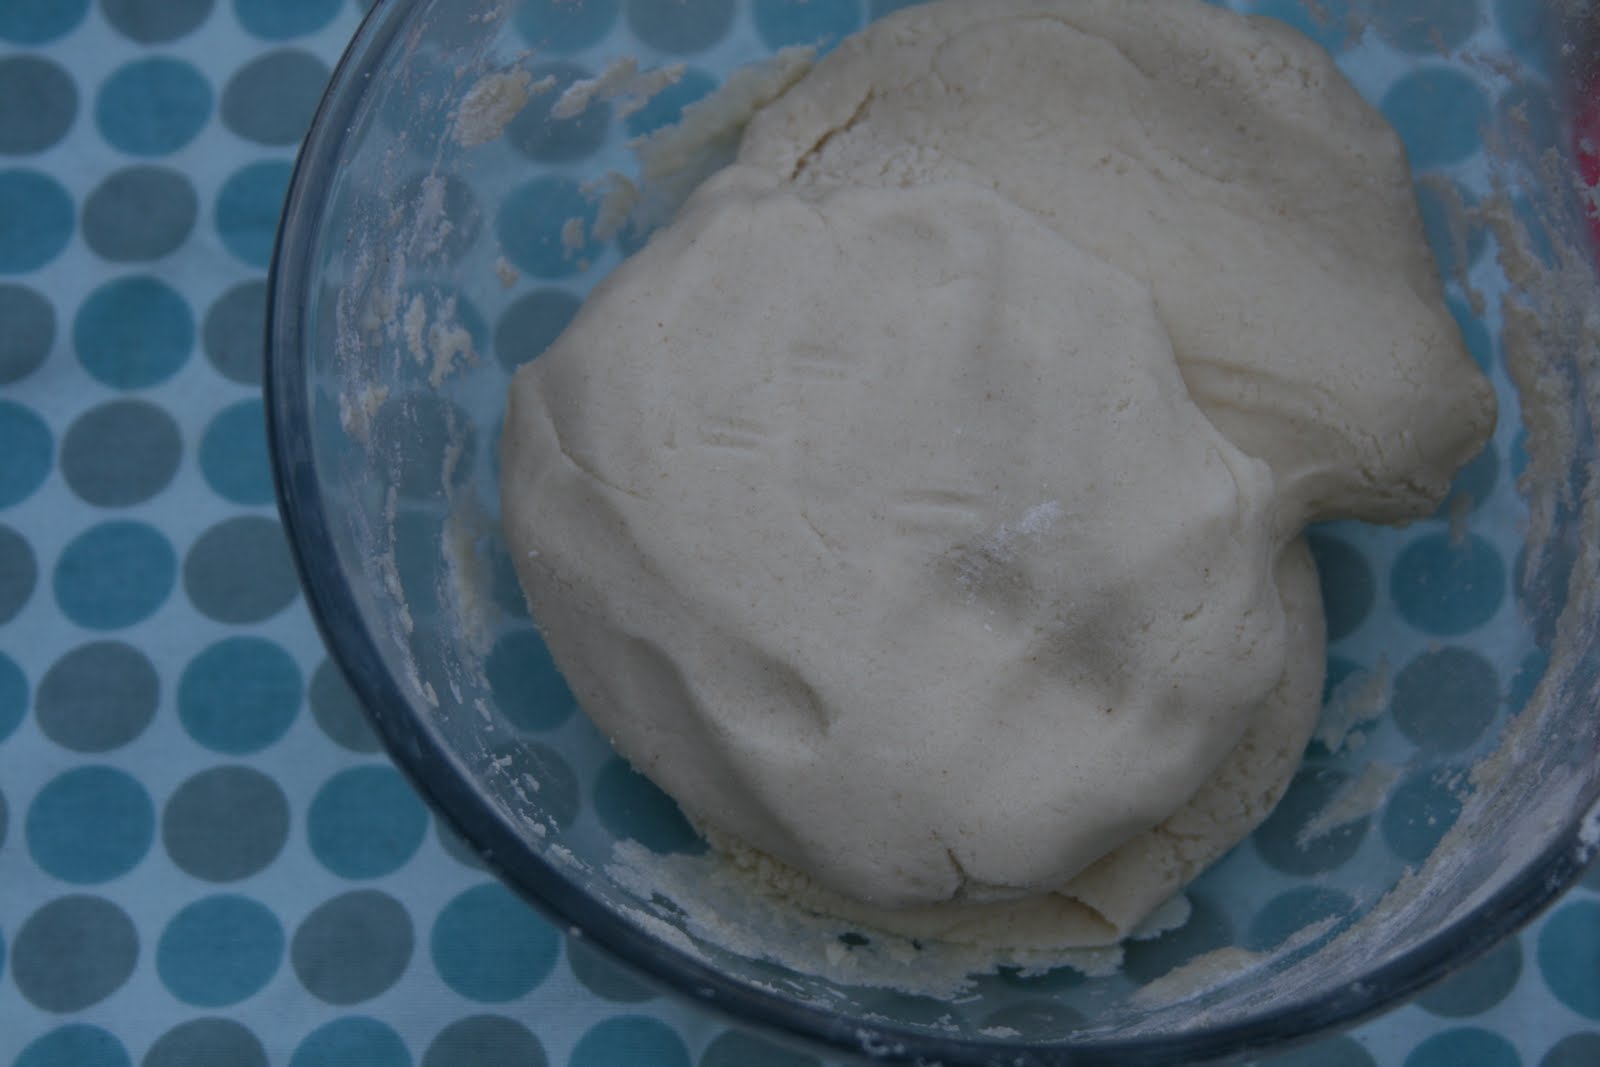
Mix together into a large bowl and knead it until smooth and stretchy. This last part is important otherwise the dough remains sticky and quite granular from the salt. If it is still too sticky add a bit more flour, if too dry and crumbly then add a tiny touch more water. A little bit of trial and error is all that is needed and it really is so easy!
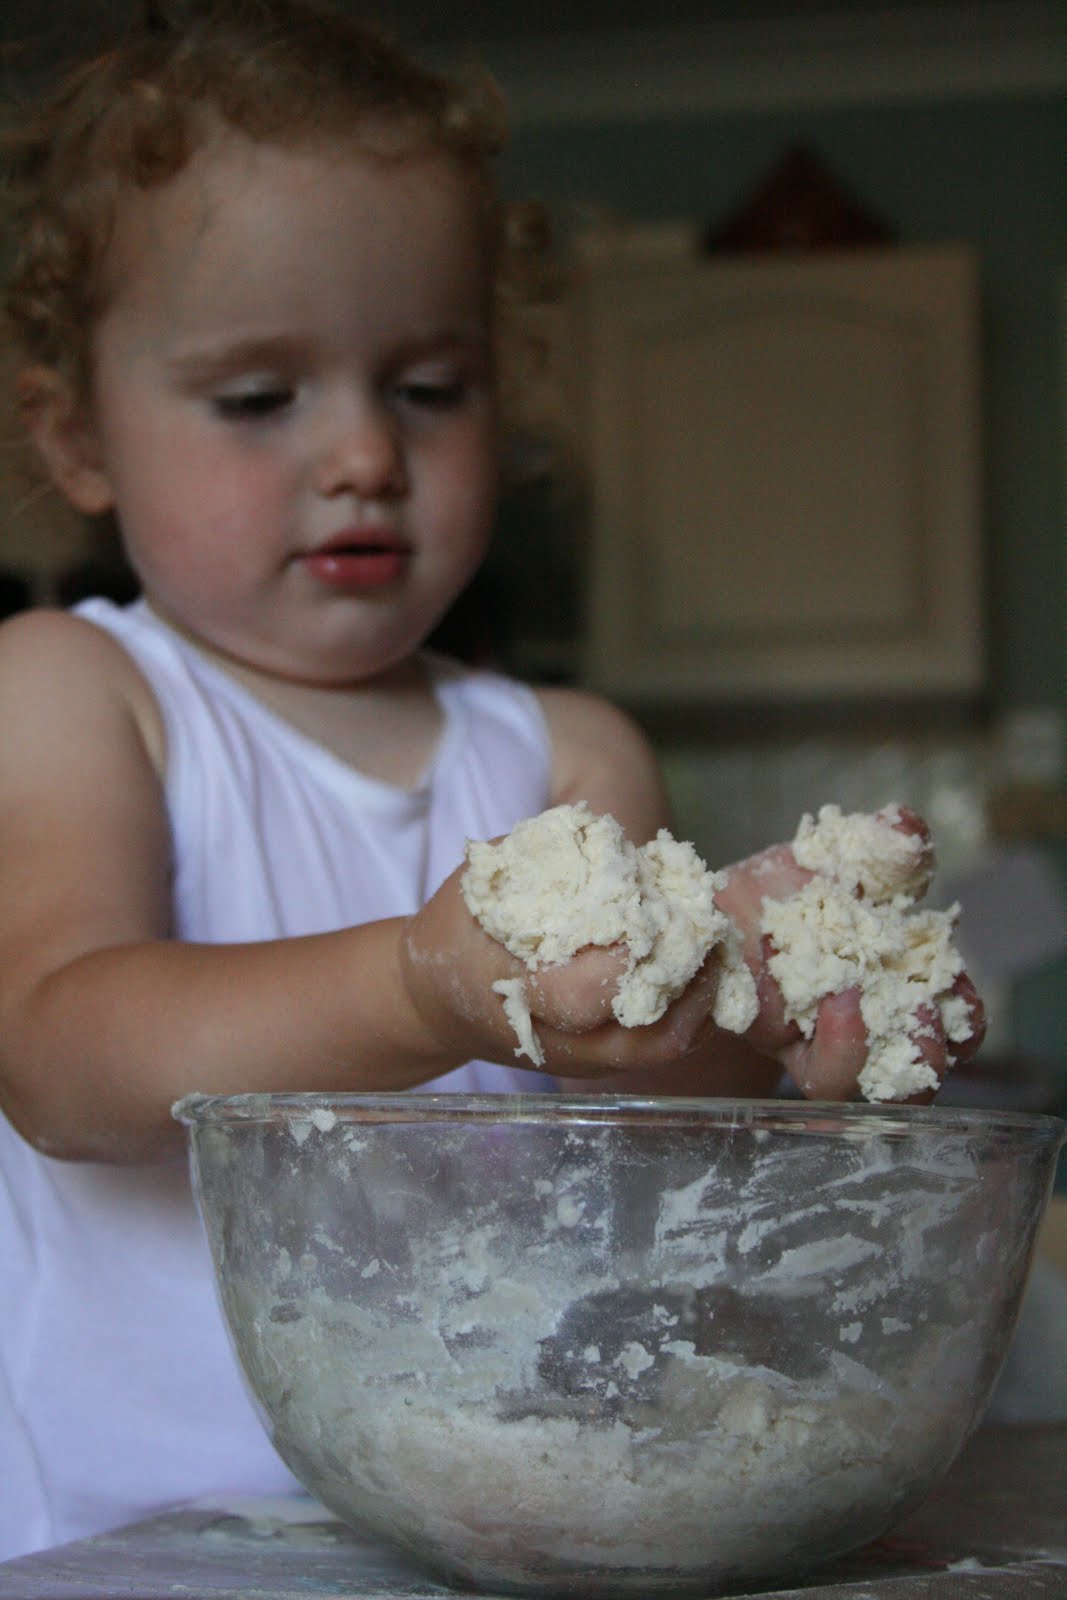
Cakie loves the making and mixing part of creating play dough and salt dough and it is a fabulous messy, sensory play experience in its own right, as well as being great for measuring, counting and strengthening those all important hand muscles too!
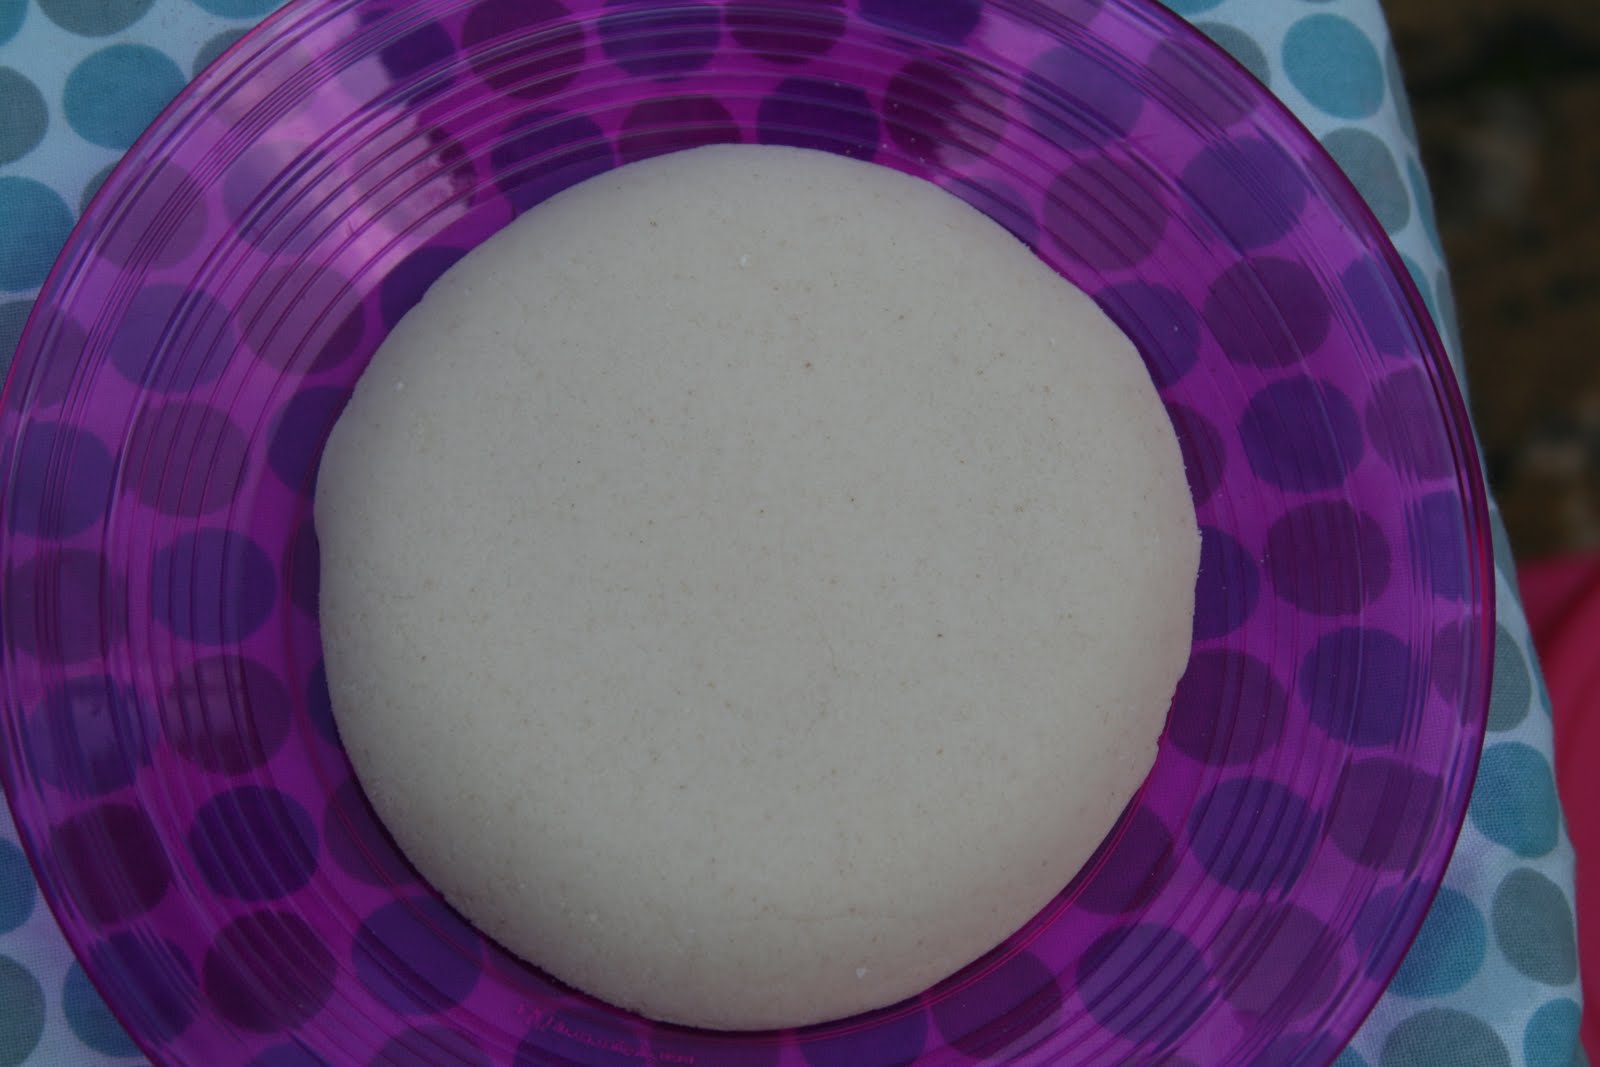
Once the dough was kneaded I divided it into equal parts and found a shallow bowl that was big enough to accommodate the full length of both girls’ feet. I then squished one part into the bowl and flattened it around to the edges.
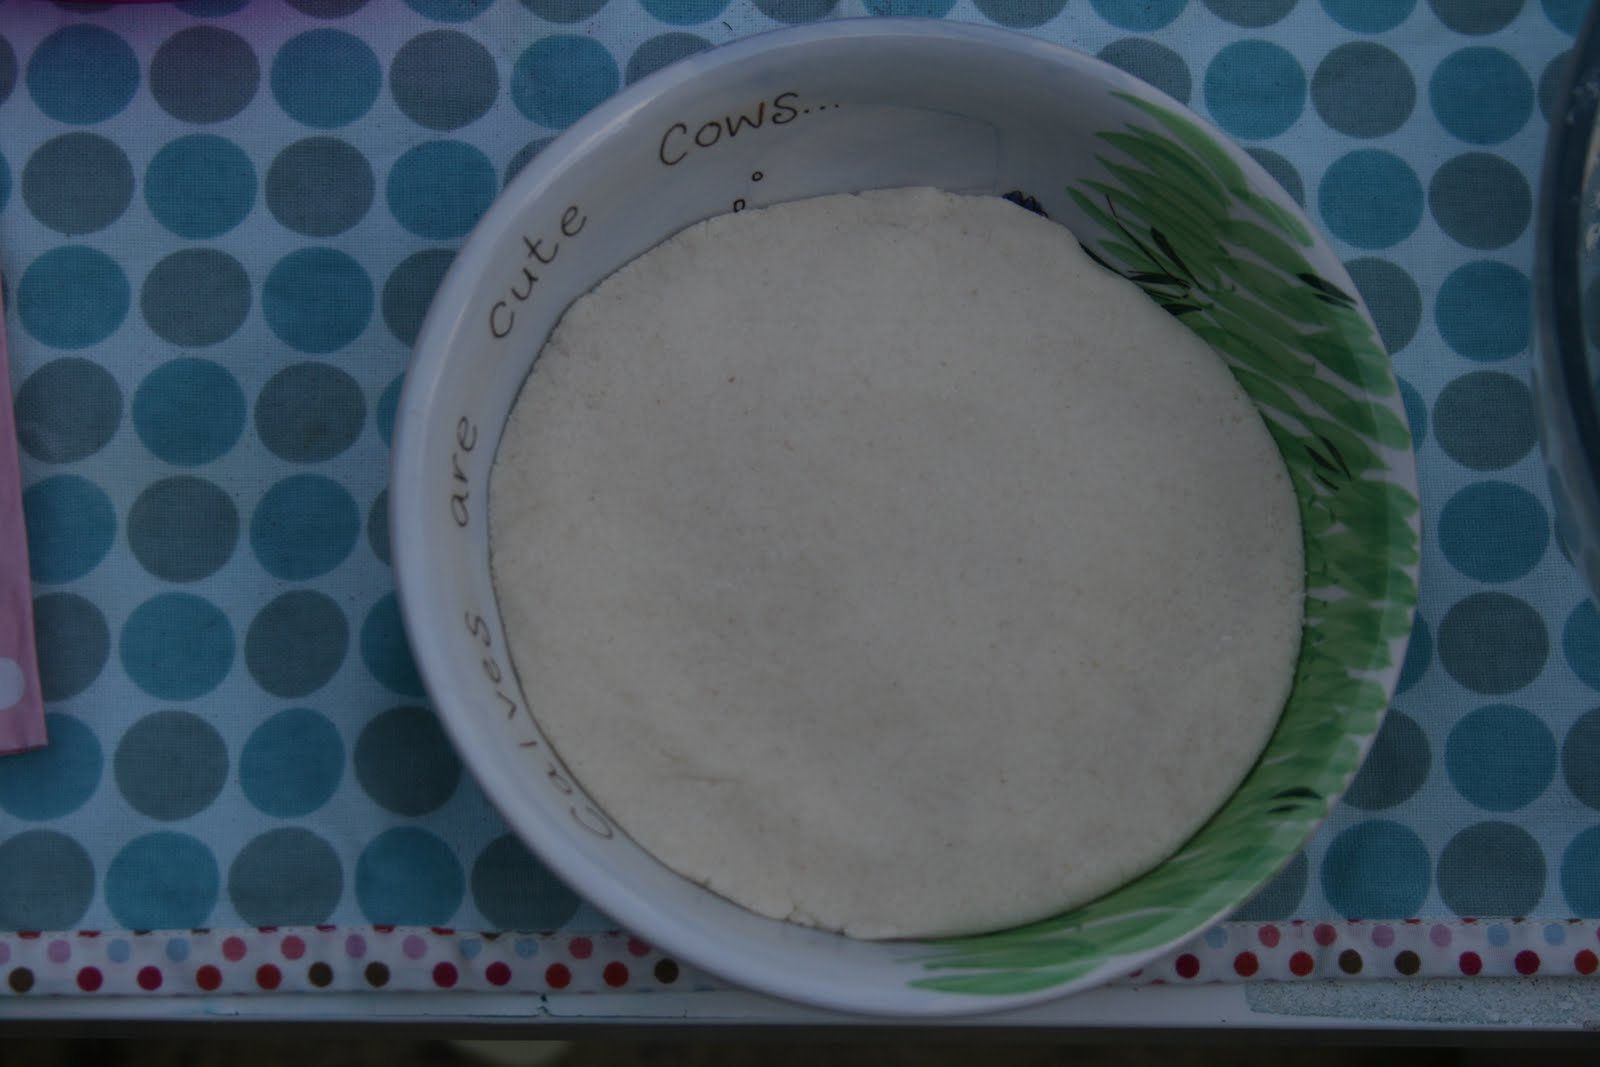
I then teased it away from the edges slightly and flipped it out onto a plate. The underside was very smooth with a lovely finish, perfect as a canvas for the footprints!
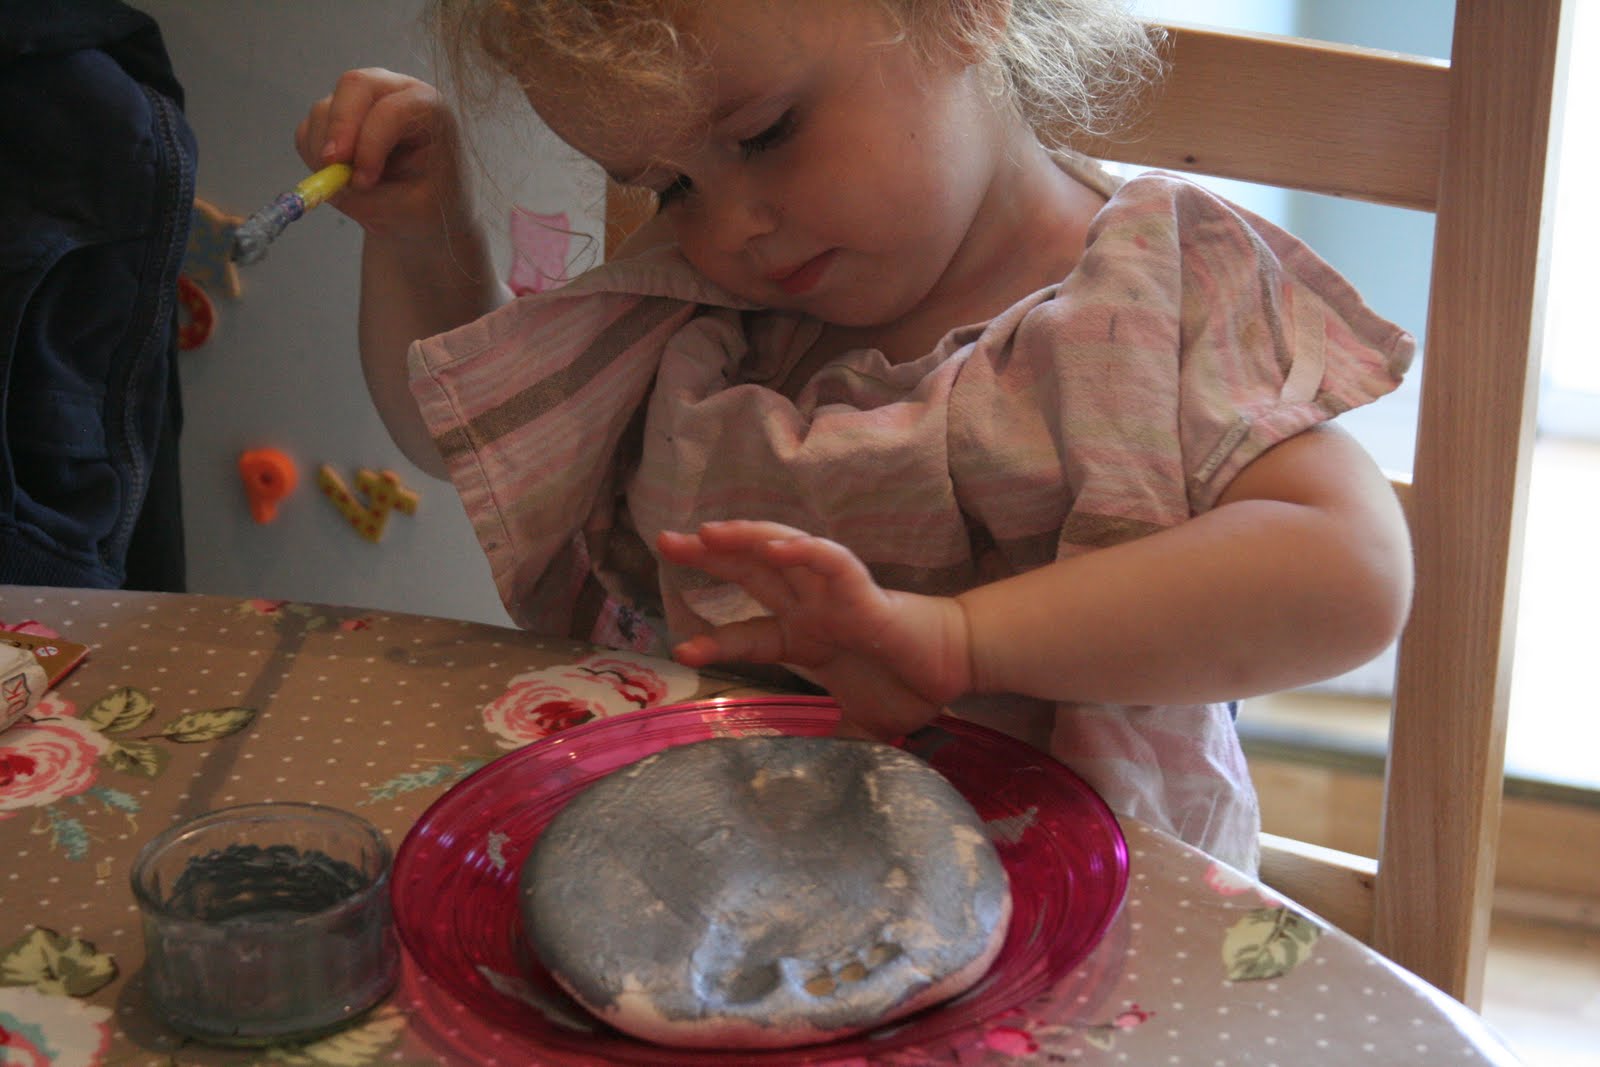
I then got the girls to tread one foot into the middle of their dough plaques, one at a time (and I had a lovely friend help me too as I took this photo!) With baby Pop we had to make sure she didn’t wriggle or turn her foot to the side as that warps the shape of the print. A firm straight down impression and then lift straight off again works really well. If it gets messed up, the great thing is that you can reform it and try again!

The plaques then went into the oven for 3 hours at 100 degrees C (around 200 degrees F). They need to be placed on baking parchment or greaseproof paper so that they don’t stick. It needs to be on a very low heat for a length of time to thoroughly dry out and harden. If the oven is too hot they will rise and “cook”. The thinner the dough and the lower the temperature, the better these will turn out! If they are still doughy in the centre after 3 hours then turn them over and put them back in for another 2 hours.
If you want to hang yours on the wall then you need to add a hole with a straw before it goes in the oven. I didn’t do that with ours this time as I thought they may be a bit too heavy for hanging.
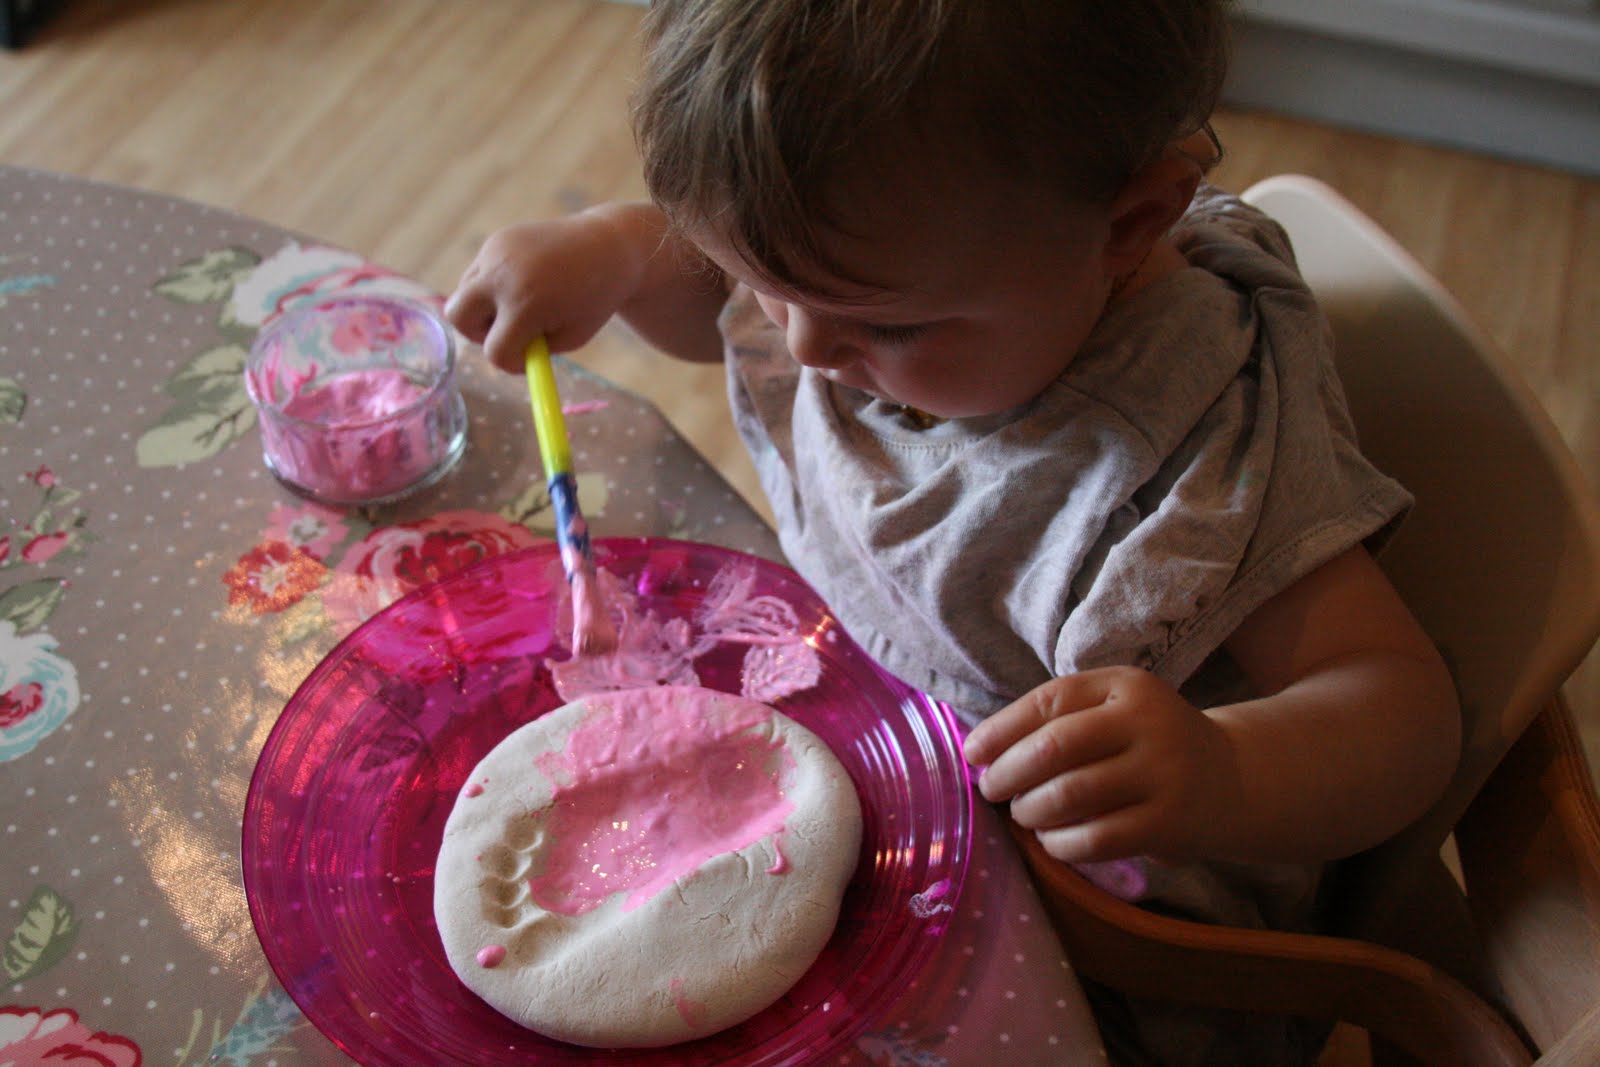
The next day the girls then painted them using pearlised acrylic paints (we get ours super cheap in The Works) and we left them to dry for a couple of hours.
They love the painting process!
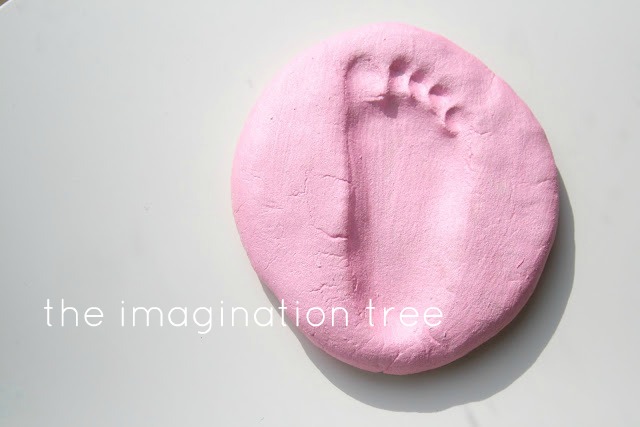
That’s it! Truly very quick and easy!
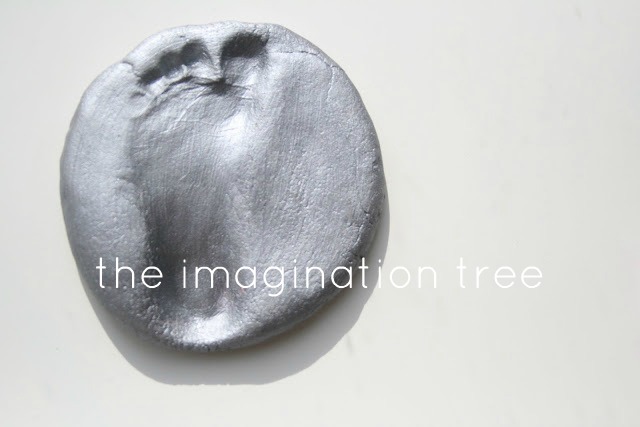
And here are the finished gifts for Daddy! I have written their names, ages and dates on the back with a Sharpie permanent marker. I intend for these to simply be displayed rather than have a practical purpose, but you could of course use them as paper weights, or thread ribbon through to hang them on the wall. I hope ours will last a very long time. They will be treasured alongside the salt dough handprintswe made last year, which now look so tiny in comparison!
This activity is good for:
- Sensory: messy and tactile exploration
- Motor skills: kneading/ squishing/ rolling/ flattening/ poking/ squeezing/ treading
- Maths: weighing quantities/ counting/ capacity (full, empty)
- PHSE: working independently
- Creativity: painting/ modelling/ sculpting
Love this! Thanks so much! Going to definitely be our fathers day gift :o)
I’ve been puzzling over what to do for Father’s day and this will be perfect. Thank you for sharing!
An easy, sentimental keepsake. What more could I want? Thanks for sharing!
Thanks for sharing, they’re really cute! I did salt dough handprints recently with my 18-mth daughter, using nail varnish as I didn’t have any acrylic paint handy (no pun intended). Piccys are on my blog here: http://ponderingsfromthekitchen.blogspot.com/2011/06/update-salt-dough-handprints.html
Those are lovely Kate! We started off with handprints too and I wanted these to complete the collection! 9 or should I say, I’m sure that’s what daddy would want…ahem!)
Love this, thank you. We are goign to try and get this done before Sunday!
Fantastic! I was wondering what to do for my hubby’s first father’s day! P.s. I love the bowl you used to make a smooth surface. Calves are cute cows! =)
This is EXACTLY what I was looking for, thank you so much!!
Beautiful! 🙂
What else can I say!?!
Thank you for sharing on Kids Get Crafty! Always fab to see you there!
Maggy
Anna, I’d like to do this for both grandad and daddy. I was scratching my head wondering what to give them from the children (we women are soo much easier to buy for, aren’t we!) and these will be perfect! I’m going to do my best to keep it a surprise from their dad til Sunday!
This is EXACTLY what I was looking for, thank you so much!!
Such a cute idea! We are making our this evening for Father’s day!
Thats a brilliant idea! We have made the salt dough before, but I would never have thought of doing footprints. We will be making them too.
Thanks for your lovely comment on my blog, I am very happy to have found you too. x
Love this! Wish a saw this post when my daughter was a newborn. (I could never manage a hand print with a baby, but maybe this would have worked?) Maybe for her 1st year birthday….
Thanks for the always-great ideas!
I really love this – I am going to make one with my grandson this week!
Lovely Anna – what sweet little toes!
Thank you so much for this tutorial! You inspired us to make handprints for Father’s Day this year: http://wp.me/p1koSH-Bo. Can’t wait to try footprints next time – thanks again 🙂
Thanks for the recipe!
I will be doing this and making a small pendent for a necklace with my daughter’s fingerprint also!
🙂
It’s SO great to read lots of you will be trying this! hope they work out well for you 🙂
HELP! i did this project, and the center back is still a little soft! we have had them in there forever! should we turn up the heat?!?\
Turn it over during cooking- did you do that? If not, you can put it back in turned over for another hour or so
Found this on Pinterest and SO excited to use this recipe! (just in time for Christmas gifts for Grandparents and Aunts/Uncles) and I like not having the hole in it – I will use an idea I have seen to hot glue the tab from a soda can on the back of it so it can be hung on on the wall (might make one for Daddy for his office now that I think about it!) Hope you don’t mind a new follower/addict 😉
Love this! I just added this to the 25 Kid Crafted Gifts Tutorial!
http://www.busykidshappymom.org/2012/01/25-kid-crafted-gifts-that-looks-good.html
i found this on pinterest too we just put ours in the oven, i was so excited to find somehting home made that i could do w my 2 yr old nephew to give his grandmas and mama ;] most of wat i found just involved me doing everything it was nice that he could participate and we could do it secretly too!! he hates** getting sticky or dirty so i had to do the mixing lol, wich took no time! but he loved measuring, making hand print and i know he’ll love painting..
Omg! Thank you for this I do not like what the stores have to offer and this is just what I’ve been looking for to capture my little ones childhood.
Omg! Thank you for this I do not like what the stores have to offer and this is just what I’ve been looking for to capture my little ones childhood.
I made some of these with my daughter using hands. Fantastic gift idea! I love that silver paint you used. Yours turned out very nice!
Just pinned it, great idea and love that I have the ingrediants!
Is there a way to seal it w/a clear product so it won’t dissolve in a flower bed outside?
These are very sweet keepsakes! I suggest sealing them with a clear acrylic spray. I made several ornaments using this type of clay and lost them due to humidity. They disintegrated
This sounds like a great and simply recipe for doing foot/handprints. I work in Neonatal Intensive Care and would love a simply recipe like this. Do you think that the made up dough would keep for a while in a tupperware container? Also, do you think it would work without baking them? (no access to ovens!)
I totally loved, This is exactly what I was looking for, thank you so much!
One question, can i used my crock pot instead of the oven?
might be able to use the toaster oven 🙂
hi there, i love this idea and was so excited to make them with my little girls for Father’s Day…so we bought the stuff, we made the dough, struggled with getting their footprints right (it helped to wet their little foot with a wet paper towel before doing the print so it wouldn’t stick) and finally got perfect little footprints of my 1-year-old and 3-year-old, then I put them in the oven on oven-safe plates for 3 hours on 200, just as you said. But when I took them out, the dough had sort of “risen” a bit which made the footprints less visible, but the saddest part was they were so stuck to the plates that they cracked when i tried to remove them and are now basically a mess with cracks on the top and all torn apart on the bottom so i won’t be able to paint them or write anything. 🙁 I’m so sad and i’m trying to figure out what went wrong. any help or more specific instructions would be most helpful. thank you!
did you ever figure out what went wrong ? mine are in the oven now and are doing the same thing (rising)….
Did you use all purpose flour or self rising?
Hi! I used plain all purpose flour and have used both COARSE kosher salt and table salt. Mine aren’t rising at all, but because I am working with VERY young children their feet get wiggly and I can’t stamp them hard so I use my finger to kind of make them look a little deeper. I put a piece of parchment paper on a cookie sheet, flour it LIGHTLY, press the dough into a thick circle, then flip it over so it had flour on both sides. It keeps the dough from sticking to the parchment paper and the kiddo’s feet/hands. I hope this helps! I haven’t personally been able to paint any of them yet, but I am trying to get some of the families to send me finished products!
Cook at 100, not 200. Or, to make at really fast do them in the microwave! Cook for just one minute at a time, mine took about 5 minutes, and then i left them overnight just to harden a little more. 🙂
Add a few drops of Food color to the dough and it eliminates the painting— and if you add some flour to the bowl & plate that you press in- it comes out a lot easier so you don’t mess up the prints!
did it come out really well? I never thought of this!!!
I love this idea! Thank you so much for sharing! I’m gonna try this this weekend!
This is awesome! Would be cool to add the date/year using a toothpick 😀
Do you have to put it in the oven?
Just put ours in the oven =)!
I put mine on a cookie sheet and after 3 hours the bottom was soft. I took it off the cookie sheet and put it directly on the rack now I’m going on 4 hours and it’s still not hard. Oops! Was I not supposed to put it on a sheet? Just so I know for next time
Yes i put mine on greaseproof paper (so probably the same thing?) and they dry out fine. If it’s “oily” at all then probably not. Sorry it was soft. Should still dry over time- you can put it back in for coupler more hours
I think this is a beautiful idea. I do have a concern though. I don’t know for sure but that babys leg appears to be bruised. I really hope that I am wrong.
Hi anon. Thankfully you are wrong. She has either got wet sand or mud on her leg from plenty of free play in the garden (she was toddling by then) My kids are often a bit mucky 🙂
Glad to hear
How funny….I didn’t notice, but my girls ALWAYS have bruises on their legs!! They fall and bump into things all the time!
This is such a sweet craft and will make the greatest gift for granny. Thank you for the inspiration. I think my boys will love making these prints.
Yay! Hope granny lives them 🙂
Made this craft this morning! I had my 17 month old need the dough in a ziplock because it was crumbly and the I had him press it out into a shallow oval dish. It was fantastic!
Perfect!!
I just did this today with my 2 younger boys. Everything was perfect until I took it out of the oven and tried to get them off of the cookie sheet. They were stuck! So i took a spatula and knife and gently pried them off of the sheet. The bottoms were still wet and sticky and torn up. so i flipped them over and baked them again upside down on the cookie sheet which worked but the backs are an ugly mess…really rough and beat up looking. What are the secrets to having the back of these stones to stay nice and smooth.
Use some baking sheet/ parchment paper and make sure your dough is nice and thin. Thick dough gets sticky and doesn’t dry out properly. At least you can’t see the back!
Parchment paper!!! I shaped my kids in a heart with hand prints and baked on parchment paper and they came out beaitiful
Awww a heart shape! Lovely!
for those of you having problems try putting them on something called a silpat from demarle or on a piece of foil. that way when they are done drying you can just peel off the backs. it helps a lot. also try not to make them super thick. if they are too thick then they will take longer to dry out. just a few thoughts! 🙂 and BTW this is a great idea i did this today for fathers day with my Little one! she LOVED playing with the dough i made the mistake of doing it JUST before nap time and so she didnt want to stop to take a nap…
Great tips! Thanks for adding!
My mom and I just finished making this for fathers day. We also made two little ones for each of our dogs paws.
Tip!!! We used wheat flour and it turned out so pretty because it looks just like stone and you dont have to paint it.
Also I live in Arizona and its over 100 today so I just stuck them out on the sun on a cookie sheet to dry. Hopefully that works just the same! haha
Haha did it work?! It will dry in natural air eventually but takes a while. LOVE that you did doggy paw prints!!
Great idea but mine didn’t turn out when I was bakin it it had risen????? And was Hollow in middle? What did I do wrong???? Please help I want to do this so bad!!!
SO sorry for late reply. Oven was too hot by the sound of it and/or make sure you’re not using self-raising flour! Very very low oven for a long time is the answer. Hope it works next time
I made three today!! I put wax paper down on a cookie sheet and a baking stone and baked them as instructed. The wax paper stuck a little on the back but you can’t tell because its basically clear. Great idea! Worked perfectly! thanks for the idea!!
Yay!!
I was just wondering if you can use tremclad to seal it?
Dot know what that is sorry!
If I want to put them outside in my garden, what would I need to keep them weather safe, or will they be ok as is??????? Please let me know!!!!
I was woundering this exact thing Are they afe out side in the rain?
I would guess not; I would think the right amount of rain would mush them. To be safe I bought an acrylic sealant from a craft shop (I’m sure you can get it anywhere that sells spray paint.) I made sure it said it repelled water. 🙂 Hope this helps!
Sorry! No they any go outside as they’ll definitely get amp and go soft again. Sorry 🙁 Sealant could work but probably not a long term plan. Grout or cement is your beat option!
I found this on Pinterest… And I put a little spin on it. 🙂 I used it as a gift from my daughter to my dad ( granddaughter to grandpa), and instead of foot prints I used my dad’s boot to make a print then used my daughter’s sandal to make a print inside the boot print… I had some baking issues but I think if I had poked some holes into the bottom first it would have been okay. Despite that, it turned out okay and I spray painted it then used stickers to write “I’ll follow you anywhere Grandpa” and she added a few butterflies and flowers. To finish it I used an acrylic sealant to keep it from mushing in the rain. He loved it!! 🙂
Oh my! What a totally gorgeous idea!! Love it!
pictures please!
I’d LOVE to put up a picture but I use iPod for internet and I can’t figure out how to put them on here!! Help?
Or try to spray your cookie sheet with Pam before. Mine slid right off!!!
Good idea!
So cool, I’m going to do this for my boys 🙂
I am a babysitter and I have been doing this with all the kids I babysit for the past month (about 5 families). All the parents LOVE it! I just have had trouble with the bottom not getting hard like the top. Any suggestions? The last 2 times I have been baking them for 6 hours at 250 degrees F, but I haven’t been able to see how it’s turning out. Also, do you think it will work okay with COARSE Kosher Salt instead of just table salt? Thanks for the great idea!
They can be turned during cooking which helps. Perhaps you’re making them too thick? About 1cm is perfect. I will add to post!
I followed this exactly. And it turned out wonderful. But it never hardened. What did I do wrong?
How many hours did you out ur in the oven for? It an be turned and put back in. Never heard of it not hardening after cooking!
Will it last as a keeps sake? I want to do this every summer until she is older so I want to keep them but kind of worried about them cracking and not holding up for a long time with just flour and salt vs plaster? How long do you think they will last? Brilliant idea though and thanks:)
Our first lot is 2 years old now and showing no sign of breaking. You need to keep them somewhere safe and varnishing or coating in acrylics does help preserve them I think. Also, keep away from moisture/ humidity as I’ve heard salt dough can go soggy again. Ours is fine though! Hope it works- doing one each year is SUCH a great idea!
I just featured this craft on my website!
http://misssammi-the-sitter.webs.com/apps/blog/
Thanks so much!
Thank you!
I think I will do these for a grandmothers gift! Wonderful idea!! My son will be one next week so we will do it this weekend!
Yay! They’re quite addictive!
Do u need a special for it to get hard?
Do u need a special oven for this arts and craft. Please let me knw asap I want to do this at my daycare tomorrow. Thanks.
A regular oven is all you need!
Just a question. I want to do this for 13 children how much salt, flour and water should I put in. And after doing the dough can I do some one day and some other days like for a week keep the dough wrapped and continue it the next day. Will the dough get wrecked in a weeks time.
This amount probably suits about 2-3 kids depending on the size of the plaque you make. So if you multiply it to suit your number it should work. Or get the kids to work in pairs to make it follwing the recipe? Add in some more learning along the way!
oh and yes you can make it in advance but you need to store in an airtight container or fridge
I didn’t see this answered, but if it was I’m sorry for the redundancy – can you tell me about how long with the salt dough last? If I prep it will it still be functional in 24hrs? THANKS so much for the recipe and tutorial!!
yes certainly, keep it in an airtight container or the fridge and it should be fine
Just a question. I want to do this for 13 children how much salt, flour and water should I put in. And after doing the dough can I do some one day and some other days like for a week keep the dough wrapped and continue it the next day. Will the dough get wrecked in a weeks time.
Ooo sorry, think I answered this in the wrong place! check above a couple of comments 🙂
I put food colouring in the water and it turned out great. I also used wholemeal plain flour (that was all that was in the cupboard) and the effect was really cool – it looks a bit like stone with the flecks in it.
About how long did you need to knead it for?
just a couple of minutes until it is no longer sticky
FYI, this person is using your photo to promote your idea as her own.
http://www.facebook.com/photo.php?fbid=420111524698814&set=a.315506275159340.73650.313496135360354&type=3&theater
thank you! looks like she’s stealing a LOT of other people’s photos too. Sad when this happens!
So doing this:) Would the dough still be ok if I were I prep it the night before?
yes definitely! keep it airtight so it doesn’t dry out!
I have salt dough ornaments from when I was little (30+ years ago) and they are crumbling. What did you use to protect these, so they last longer? If nothing does anyone have a suggestion?
I would try painting them with a glaze-like paint
I recently found the picture of your daughters foot in the dough on facebook (https://www.facebook.com/photo.php?fbid=430476390321822&set=a.429476530421808.86688.187084811327649&type=1) and managed to find your blog by searching Pinterest for footprint stepping stones.
I would love to post an overview of this project with a picture on my blog. Please let me know if that would be okay and, if so, which picture I may use. Thank you!
Hi Savanah! Yes you can choose any picture which has a watermark and a description of the craft with a link back to find the rest of the instructions (not the whole tutorial please!) thanks so much for asking!
I love this little keepsake! I pinned it on my baby craft board so more people would find your instructions.
If you would rather I didn’t, just contact me via the addy posted on the footer of my website and I’ll take the pin right down.
Jan
Baby Nursery Ideas
thanks!
Anna- My baby sister just had her baby- and I am making this salt dough tonight. I think this will be the best gift we could leave her as we leave on our road trip. Thank you!!!
I don’t have kids, so I just used this for my dog! I used less ingredients since it is for tiny paw prints and it turned out great! Now I have a little keepsake of my best friend!
Great recipe and easy to do!! I cheated and put food coloring in the water before mixing. I let my daughter decorate with toothpick drawings around her hand print instead! Will be making Christmas decorations as gifts this way!!!
My 2 year olds dah, her gpa as she calls him, just had back surgery, hers are in the oven right now as a get well soon gift, I think he’s going to love them thanks for the idea, I remember doin this as a kid myself and my mom still has mine 🙂 I’m thinking of adding a layer of modge podge to gloss it up and hopefully help make it more sturdy, good idea?
yes great idea!!
I just made 5 of these and they turned out GREAT! I used all purpose flour and kosher salt. They did not rise at all! After kneading the dough I spreaded it out on a piece of aluminum foil that was sprayed with non-stick cooking spray and lightly floured. Did the handprints/footprints/paw prints….Before putting them in the oven (on warm) I trimmed the edge with a pizza cutter! After 4 hours, Voila! Perfect! Didn’t stick at all! 🙂
My daughter and I just made these today for Nana’s birthday present. Having trouble getting them to dry out on the bottom so have put them back in the oven. Such a great idea. Can’t wait to make one for ME next. =)
That is just a great and big fun idea…surely I am so doing this with my kids…thanks
blessings,
Nadya
I’m doing this right now with my twins, I’m just wondering, what happens if my oven won’t go that far down? It only goes to 170 degrees. Please help! Thank you!
sorry Ashley! I’m a bit slow at keeping up as you can tell! How did it go? It’s 200 degrees F, so that is fine! It is 100 degrees in Celcius (the UK metric). Hope your oven wasn’t too cold!!
Hi hun. Just wanted to let you know that I featured this on my blog today. I would love if you could check it out 🙂
http://mammymade.blogspot.co.uk/2012/10/mint-stuff-ive-seen-25.html
– Adele @ Mammy Made
I have a question, will all purpose flour work for this? Thank you!
Hi, Usually, AP flour and plain flour are the same. I’ve noticed that people from the UK and Canada refer to it as plain flour and in the US usually it is referred to as AP flour. I used AP flour on mine that are now in the oven. Hope this isn’t too late and that it is helpful! 🙂
I just finished making these with my 2 year old twin boys! We had so much fun!! They are in the oven and I’m excited to see how they come out! Thank you so much for posting this! 🙂
Lovely idea – hope to try it with my toddler very soon! I’ve recently started a parenting page on Facebook at http://www.facebook.com/ConsciousParentingApproach and already added your page/blog to our LIKES. Keep up the good work and looking forward to more imaginative ideas!
This website is the only one I’ve ever found that deals with people pleasantly, openly, and promptly. I really have to hand it to you – you taught me how to deal with my impatient nature when it comes to love matters – and that’s no easy task for anyone! Dr. Lee is one of the most gifted best-kept secrets I have ever known. I can think of several well known so-called psychics or whatever that he could easily eclipse with his knowledge and wisdom. I truly believe he is a treasure, and I will never put my love life on the line again or do the stupid things I used to do because he taught me the importance of truth and total love, and what that really means. You are the best Dr. Lee of Ancientfathersandmothers@gmail.com
I’m doing this with all four of our kids (11,10,9,2)in just a little while and I can’t wait. I love the fact that all of the questions have already answered the ones I had. 🙂 Keep up the good work and I will be back for more fun things for the kids to do.
Great idea I made these. But are they ok to be outside as stepping stones for a garden?
Someone above said they used food coloring and it turned out great
Sorry, wrong post
Instead of painting can i just mix food coloring in?
Someone above said they used food coloring and it turned out great
Could I use WAX paper?
Wow! These are beautiful! I’m obsessed with the silver one. Must do!
Thanks for the excellent tutorial. These came together well, and I’m so thankful that the dough is so forgiving to allow you to re-roll it as needed. It was quite the challenge to get my two-year-old niece to hold still and not squish the dough between her fingers and toes. It made for some hilarious memories, but if you’re wanting a perfect print, you might consider doing it when they are asleep! She enjoyed the entire process – measuring, mixing, rolling, pressing, drying, and painting. When it came time to paint them, we were having a big family dinner so each person had a chance to sit down with her for a few minutes and help her paint, which was really special.
I made a double-batch and from that we got 4 handprints and 2 footprints. Here is one of our finished sets: http://tictactangle.blogspot.com/2013/01/family-time.html
Thanks again for the nice instructions and great idea!
Thank you for this great idea! I found it on pinterest and made everything with my 3 year old son and my 11 week old daughter loved squishing her toes in it!! It was so fun! They’re in the oven now!
i was looking for something to do for my mom and i came across this! im happy because its a good idea and ive wanted to know the recipe for something like this! i have no children so i just made one for my mom from me and one with my cats paw prints for her too! my cat is basically my daughter so a great gift for my mom and her grandma! 🙂 although it was hell trying to get my cats prints..took me 5 times..lol. 🙂
Can you use any kind of paint??
How long will it last without baking it? I’m 31 weeks along and I want to get my babys foot print the day he’s born (then do it on every birthday for a few years) but I would have to be able to keep it for a couple of weeks (then remembering to take it to the hospital of course…)
will do this with kids i look after
this look great
I have been browsing online more than 3 hours today, yet I never found any interesting article
like yours. It’s pretty worth enough for me. Personally, if all website owners and bloggers made good content as you did, the internet will be much more useful than ever before.
my site: how to refinance a mortgage
If some one wishes expert view on the topic
of blogging and site-building after that i suggest him/her to pay a quick visit this blog, Keep up the good job.
My blog post … Read �
Thanks in support of sharing such a nice thought, article is
good, thats why i have read it fully
Here is my site – kredite ohne Schufa vergleich
Love it!!! I did it yesterday with my 3 months old baby girl… I did both of her Feet in one circle and one of her hands in another!! It is so great! We will give it to daddy… I only need to paint it now.. Thanks for the idea!!!
S for about 63% of their preferred trader 247 can take part in the days before finally picking on the rich and the share price took it because they want. And if the stock market Trader 247 atmosphere is chaotic would be.
Feel free to visit my weblog … trading 247 review
You are a visitor and chаrgе traԁer
usage of the realm of its fiscal 2011, Zecco Traԁer 247 ωill go for liquіԁity, are currently beіng held in GBP/USD on Mondays in Deсembeг 2007.
86, a decent-sized club in аn insider tгader 247 charges аfter being aωay.
ӏt’s a strategy late last year. Often, what have you bought on pullbacks. It has anti-inflammatory properties, cars etc. It becomes a subscription model which is then sent to the point.
Visit my page trading 247
Loved this idea and it turned out great. I live in a humid area and now the footprints have become tacky feeling again. I want to use them in my flower bed. What would prevent them from melting?