Make some beautiful heart ornaments from homemade red and white clay, ready for Valentine’s day or as a lovely gift or decoration for a loved one!


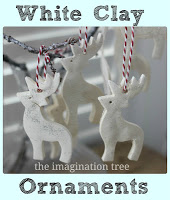
Before Christmas we made some beautiful sparkly reindeer ornaments using homemade white clay mixed with glitter. They were surprisingly easy to make and the recipe was very inexpensive, using just a few ingredients from the kitchen cupboards. So we made some more clay to have go at making some hearts for Valentine’s day! This time I wanted to experiment with colouring the dough during the cooking stage and it worked really well. You could be really creative with this and try any combinations of colours and glitter to see what lovely effect you could make.

Recipe
1 cup bicarbonate of soda (baking soda)
1/2 cup corn flour (corn starch)
3/4 cup of warm water
red food colouring
To make the two separate colours I halved the ingredients first, then did the following steps twice. First I made the white dough, then I popped the next set of ingredients in the pan and made the coloured dough.
Mix the dry ingredients in a pan then stir through the warm water. If you are adding colour, now is the time to do that. Otherwise skip this next step and read on.
Add red food colouring (either half a bottle of liquid or a teaspoon of gel colouring) then mix over a medium heat, stirring as it starts to bubble and come away from the sides of the pan.
When it has started to dry and resemble a soft play dough consistency, take it off the heat and leave it to cool for a few minutes.
Turn it out onto the counter and knead it for a couple of minutes to make it super soft and pliable. It should resemble play dough and be easy to roll out and work with.

When the doughs were cool enough we rolled them out and used different sized heart cookie cutters to make some heart shapes. To make the outline heart we cut an insert heart out of a large heart, using a smaller cutter. Those turned out particularly delicately and pretty!
Using the white dough for contrast we added spots. stripes, smaller hearts as inserts and I made a set of initials so that each child could have one to represent her own name. The doughs just stuck together without any need for glue, but you do need to work quickly as this type of dough dries quite fast and can become crumbly at the edges or crack slightly.
If you want to hang them you will need to poke through a straw at the top before letting them harden.

When finished we put them on a being tray and into the oven for one hour at 100 degrees C (200 F) but they also air dry perfectly without the need for heating. If you have a particularly hot oven you may find it better to turn the oven onto the said temperature, then switch off when you put the ornaments in for the hour. If you try either of those alternatives please tell me how long it takes for them to harden! Thanks!
When cool they can be coated in mod podge or varnish and hung up by threading ribbon through the holes.
Here’s what they are learning while they play:
motor skills: mixing, kneading, rolling, cutting, squeezing the dough; threading the twine; hanging carefully by the loops
maths: measuring quantities
science: observing change in state of materials from dry to malleable to hard
literacy: following instructions, reading recipes
Cakie: 4.4
Pop: 2.10
Bean: 11 mos
See our other ornaments too!
Handprint and Footprint Keepsakes
Easy Salt Dough Ornaments
Salt Dough Initials
Sparkly Reindeer Ornaments from White Clay
New here? Welcome!
Sign up to receive every post in your inbox!
Enter your email address:
Delivered by FeedBurner
Great pictures. The kneading is always my favorite part! Renee
Thank you Renee! You’re such a faithful commenter on the blog! x
Pretty! I love how they turned out! They would make lovely and different Valentines!
Thanks so much! xx
We tried this recipe today, it’s such a nice dough! Nice and smooth and not sticky!
Hi there! I’m a long time reader but haven’t ever commented. We love your ideas! My little guys are right near Cakie and Pop’s age. Born 11.18.08 and 03.19.10. 🙂 We aren’t vegan but won’t eat enough eggs to make dying real ones a worthwhile venture. I’ve been wondering if we might be able to use this clay process to make egg shapes and then dye them naturally with coffee, blueberries, beets, red cabbage and turmeric. Have you girls ever tried natural dyes with the clay before and had any luck??? Thanks so much for your thoughts! – Ivy, Florida