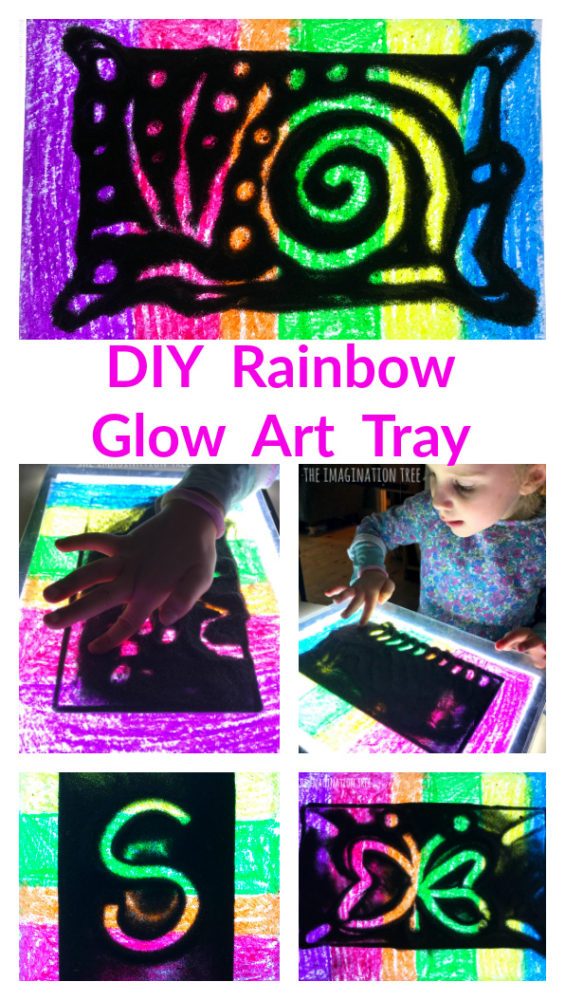
Make a gorgeous DIY rainbow glow art tray for a unique way for kids to enjoy drawing pictures! Brilliant for dark winter months and a wonderfully rich sensory art experience for all. Perfect for practising letters and sight words as a sensory writing tray too!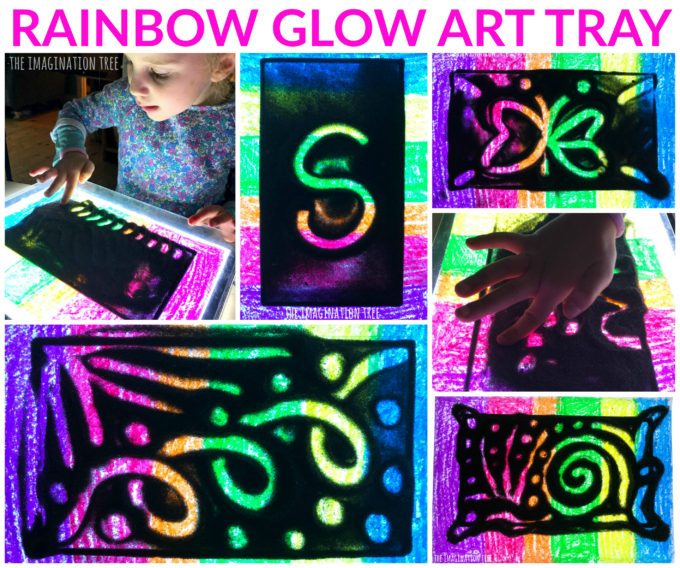
This sensory art and writing tray is so easy to make and just requires coloured paper and some dyed salt! You do need to have a light panel as your base and I can thoroughly recommend these as one of the best resources to enhance your child’s play and learning!
They’re sold as drawing pads for artists and architects and are prefect for building on with clear plastic construction toys, as well as a myriad of other uses. This glow art tray is such a fun one! If you follow me on Instagram you’ll see I use ours often during daily play times with my 2-9 year olds. They all love it.
I’ve linked to an inexpensive one which I would recommend below.
Materials Needed:
Salt
White paper
[Amazon affiliate links]
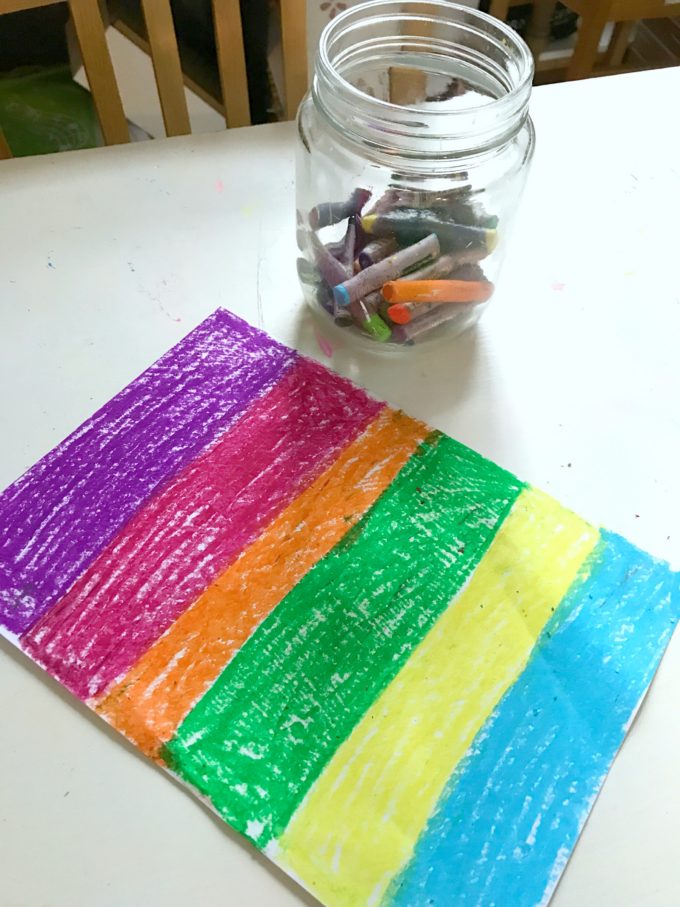
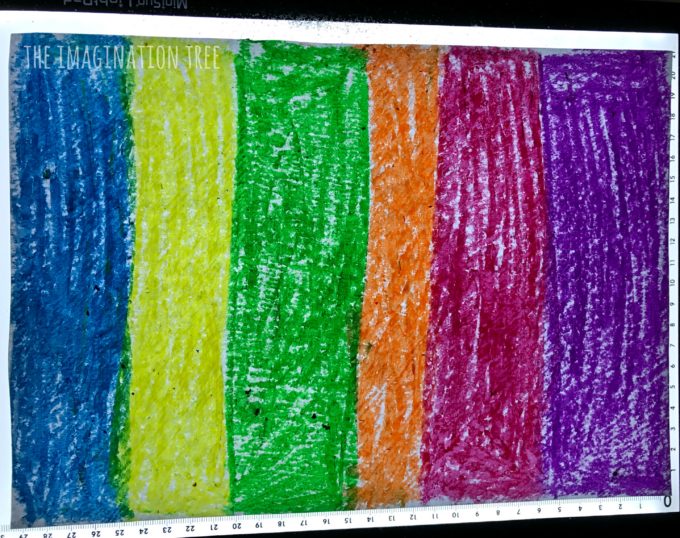
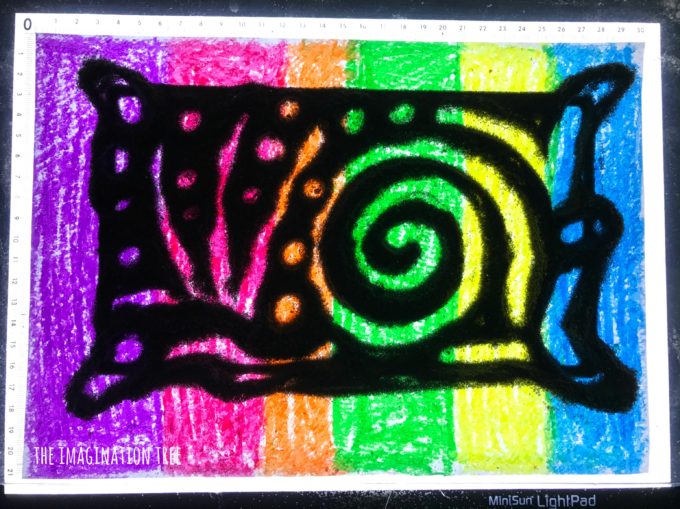
Colour your paper with random blocks of bright, rainbow colours, using oil pastels. They’re vibrant and creamy, making an almost painterly effect on the paper, and therefore creating a great impact when light is shone through them.
Place the paper on the light panel and then put a clear tray over the top. We have linked to the exact clear tray which we used as it took a long time to find one that was flat and rectangular! You may find similar in the party aisle at the supermarket.
Make the grey-black salt:
Mix about 1/4 cup salt with half a teaspoon of black gel food colouring in a zip-loc bag. Seal the bag and mix the colour into the salt evenly, by pressing through the plastic with your fingers until it’s fully combined. Then tip it out onto a plate to let it dry, which will take about half an hour. [You can see where we first made this black salt in our Moon Sensory Writing Tray here.]
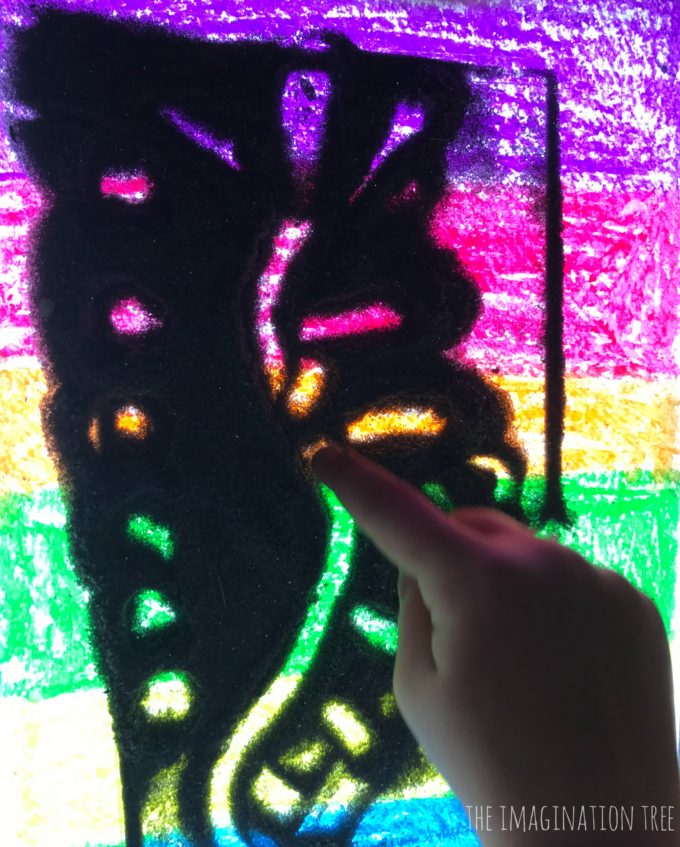
When it’s ready pour a small layer of the grey-black salt into the tray, not too much or else it will be hard to make clear enough marks.
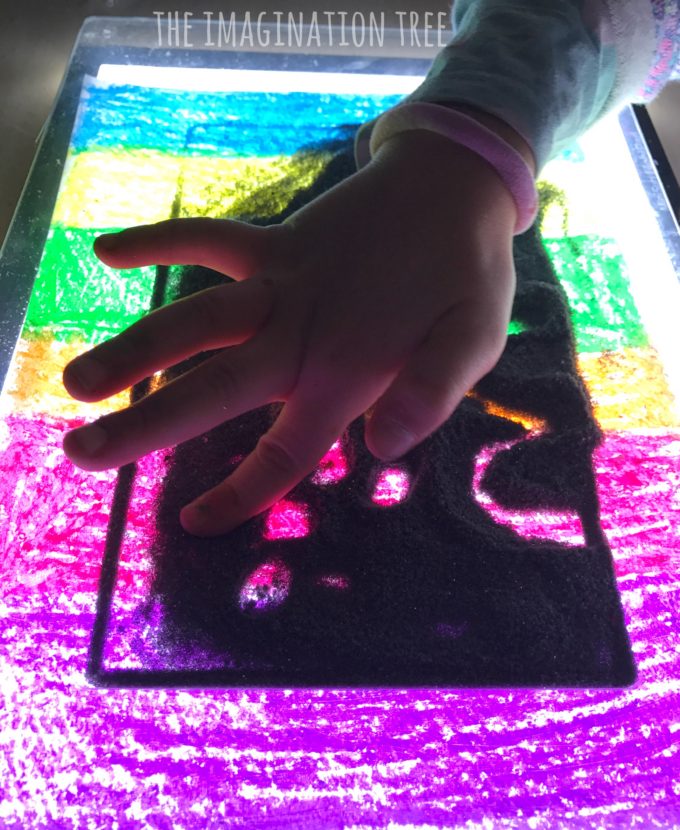
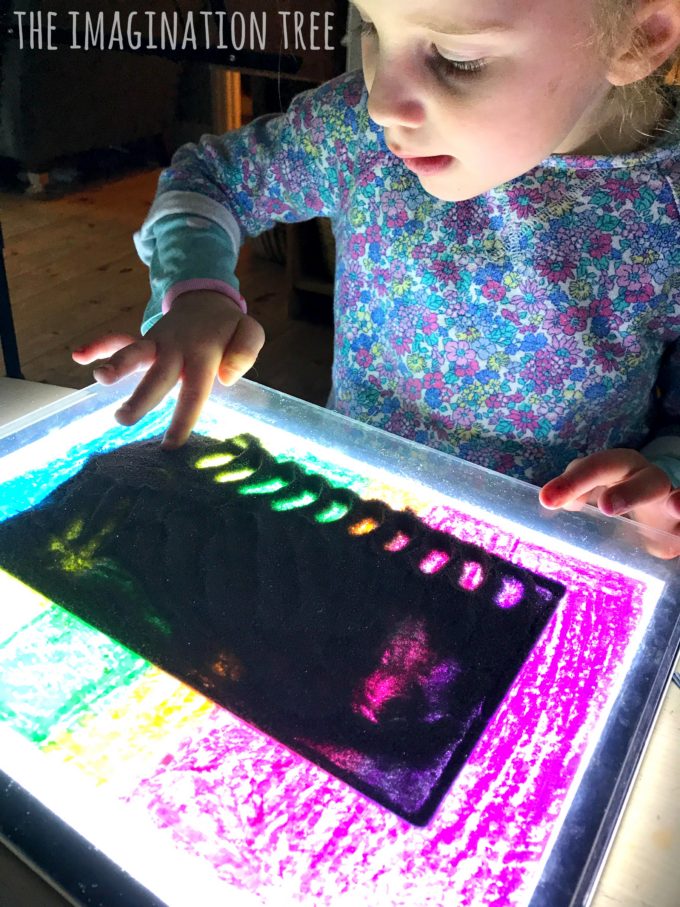
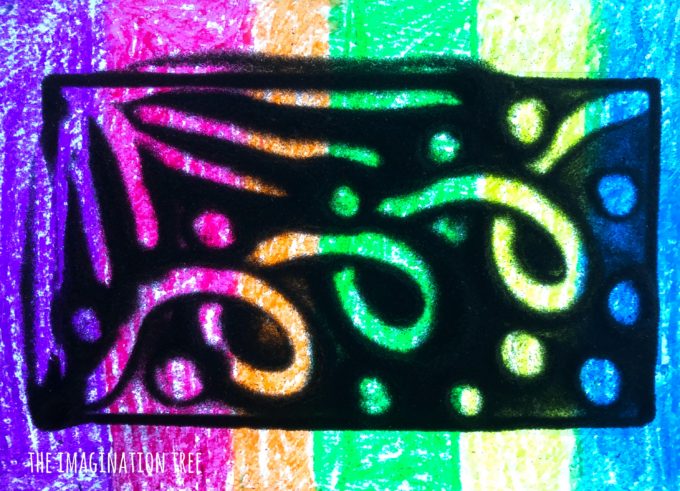
And now it’s ready to play! Start to make marks, write and draw to your heart’s content with either your fingertips or a dry paint brush and see what effects you can create.
It was really satisfying to experiment with and I played just as much as the kids this time 🙂
The effect was like stained glass!
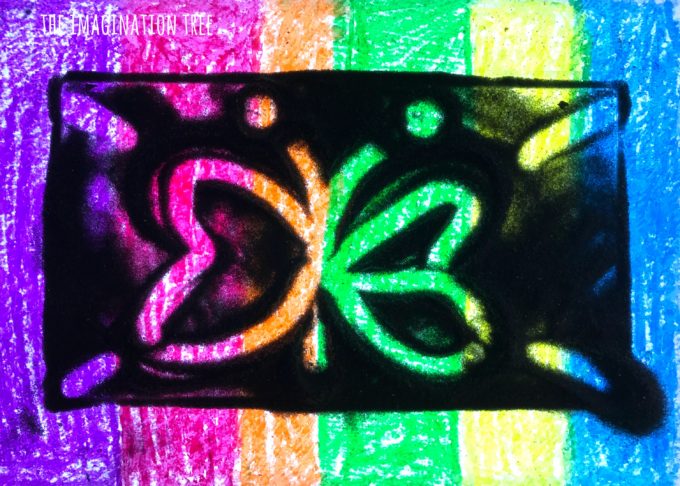
You could make characters from books, favourite animals, scenes from nature, self portraits etc!
And as we first made it around Bonfire Night it was fabulous for creating whizz-popping fireworks displays with!
It would be a great beginner mark-making tray for toddlers and preschoolers as the magic of the marks suddenly glowing brightly is wonderful to watch!
It would be such a lovely method for practising letters, sounds, sight words, name writing and maths problems too. Miss 5 had a little go at letter writing and loved seeing them glow.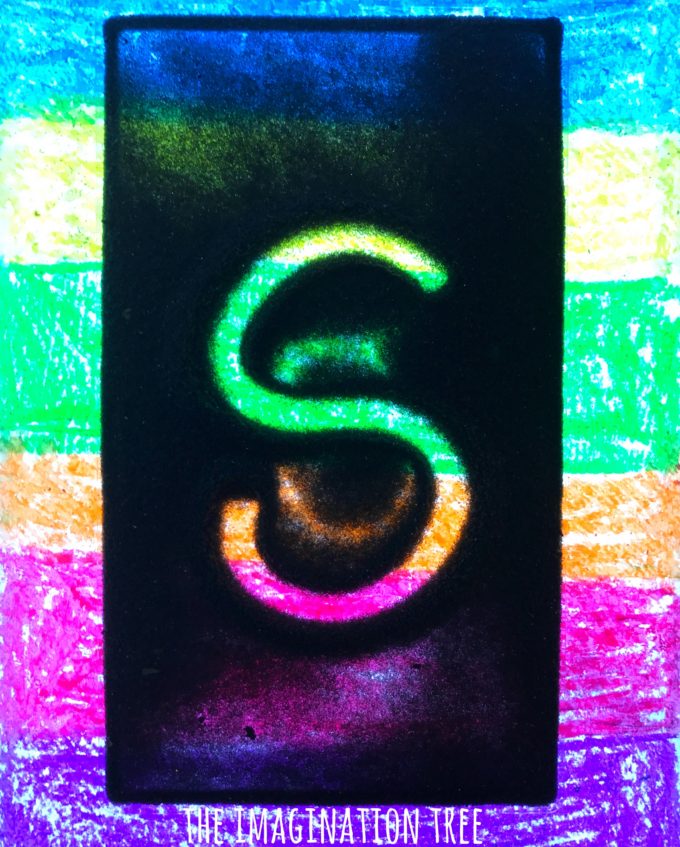
You could experiment with different patterns and designs underneath the plastic tray instead of rainbow. Let us know what you try!
If you loved this DIY rainbow glow art tray then please do share it with others on Facebook or Pinterest!
You can find many more tutorials for homemade toys and resources in our extensive archives!
And lots of ideas for SENSORY WRITING/ ART TRAYS here too, all themed by subject and season.