
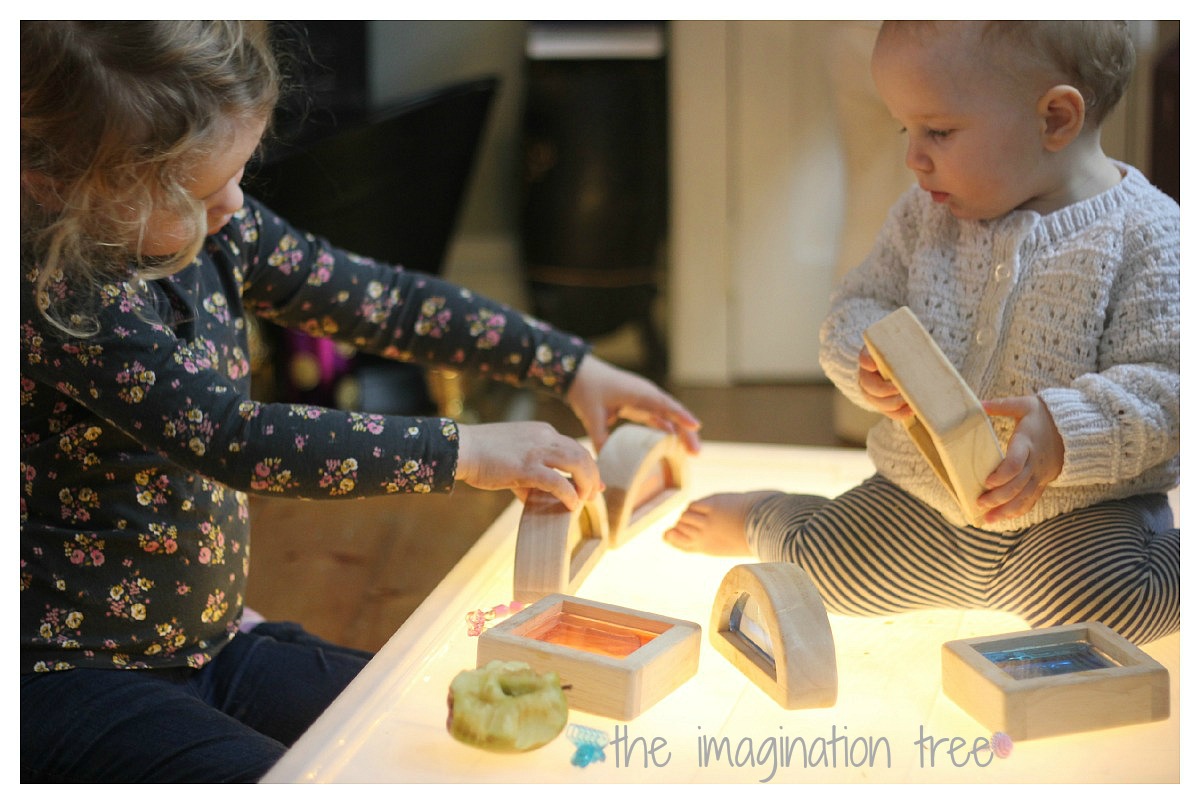
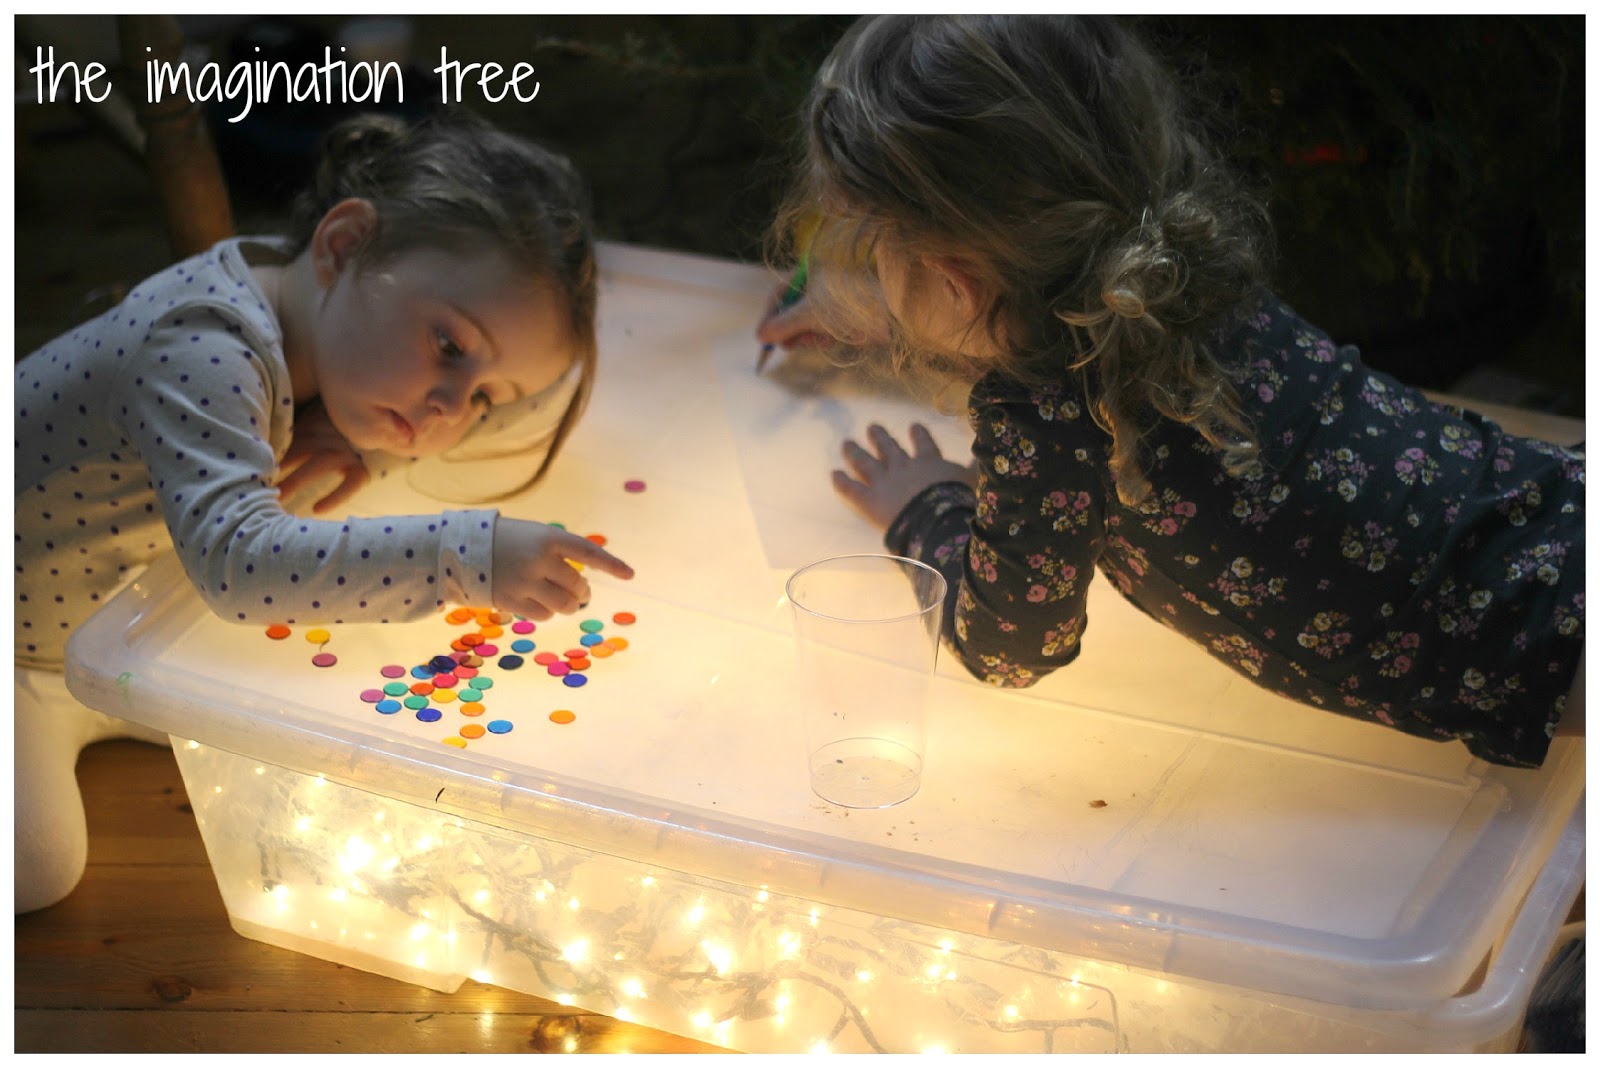
Baby crawled over and climbed straight on top of the box, where she remained all afternoon until bedtime (give or take having her dinner and bath!) She was totally mesmerised by the light and loved being able to play at such a convenient height. Because of the size of the box, all three of them were able to play at the same time with enough room each, which is a huge bonus for us.
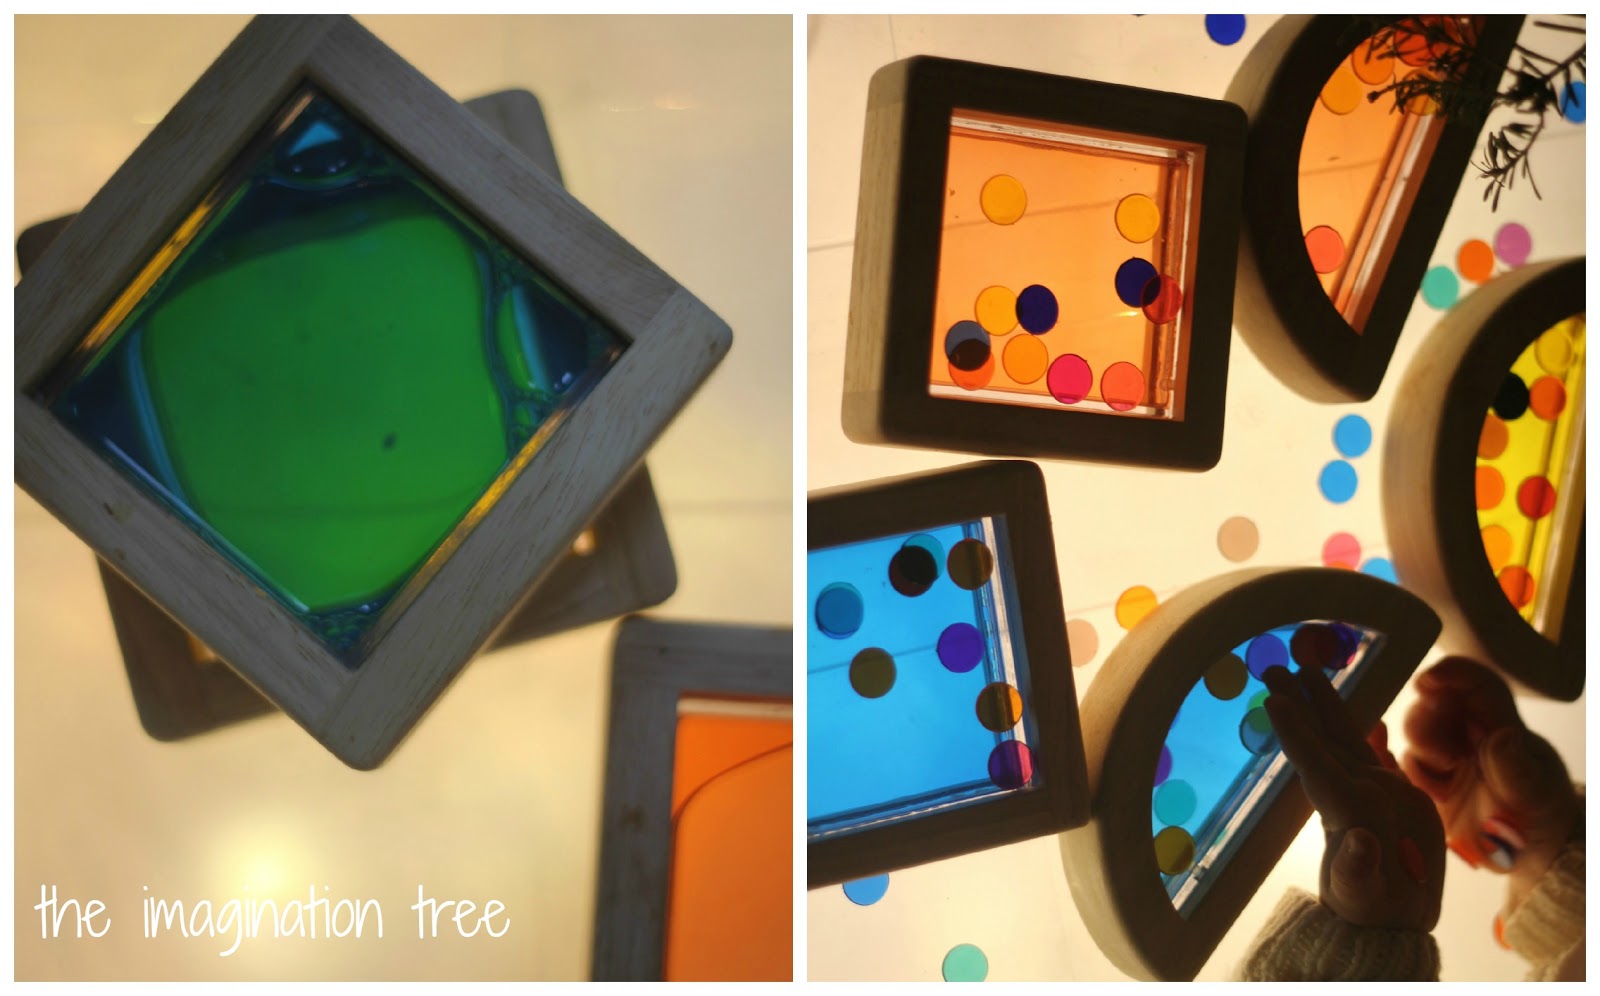
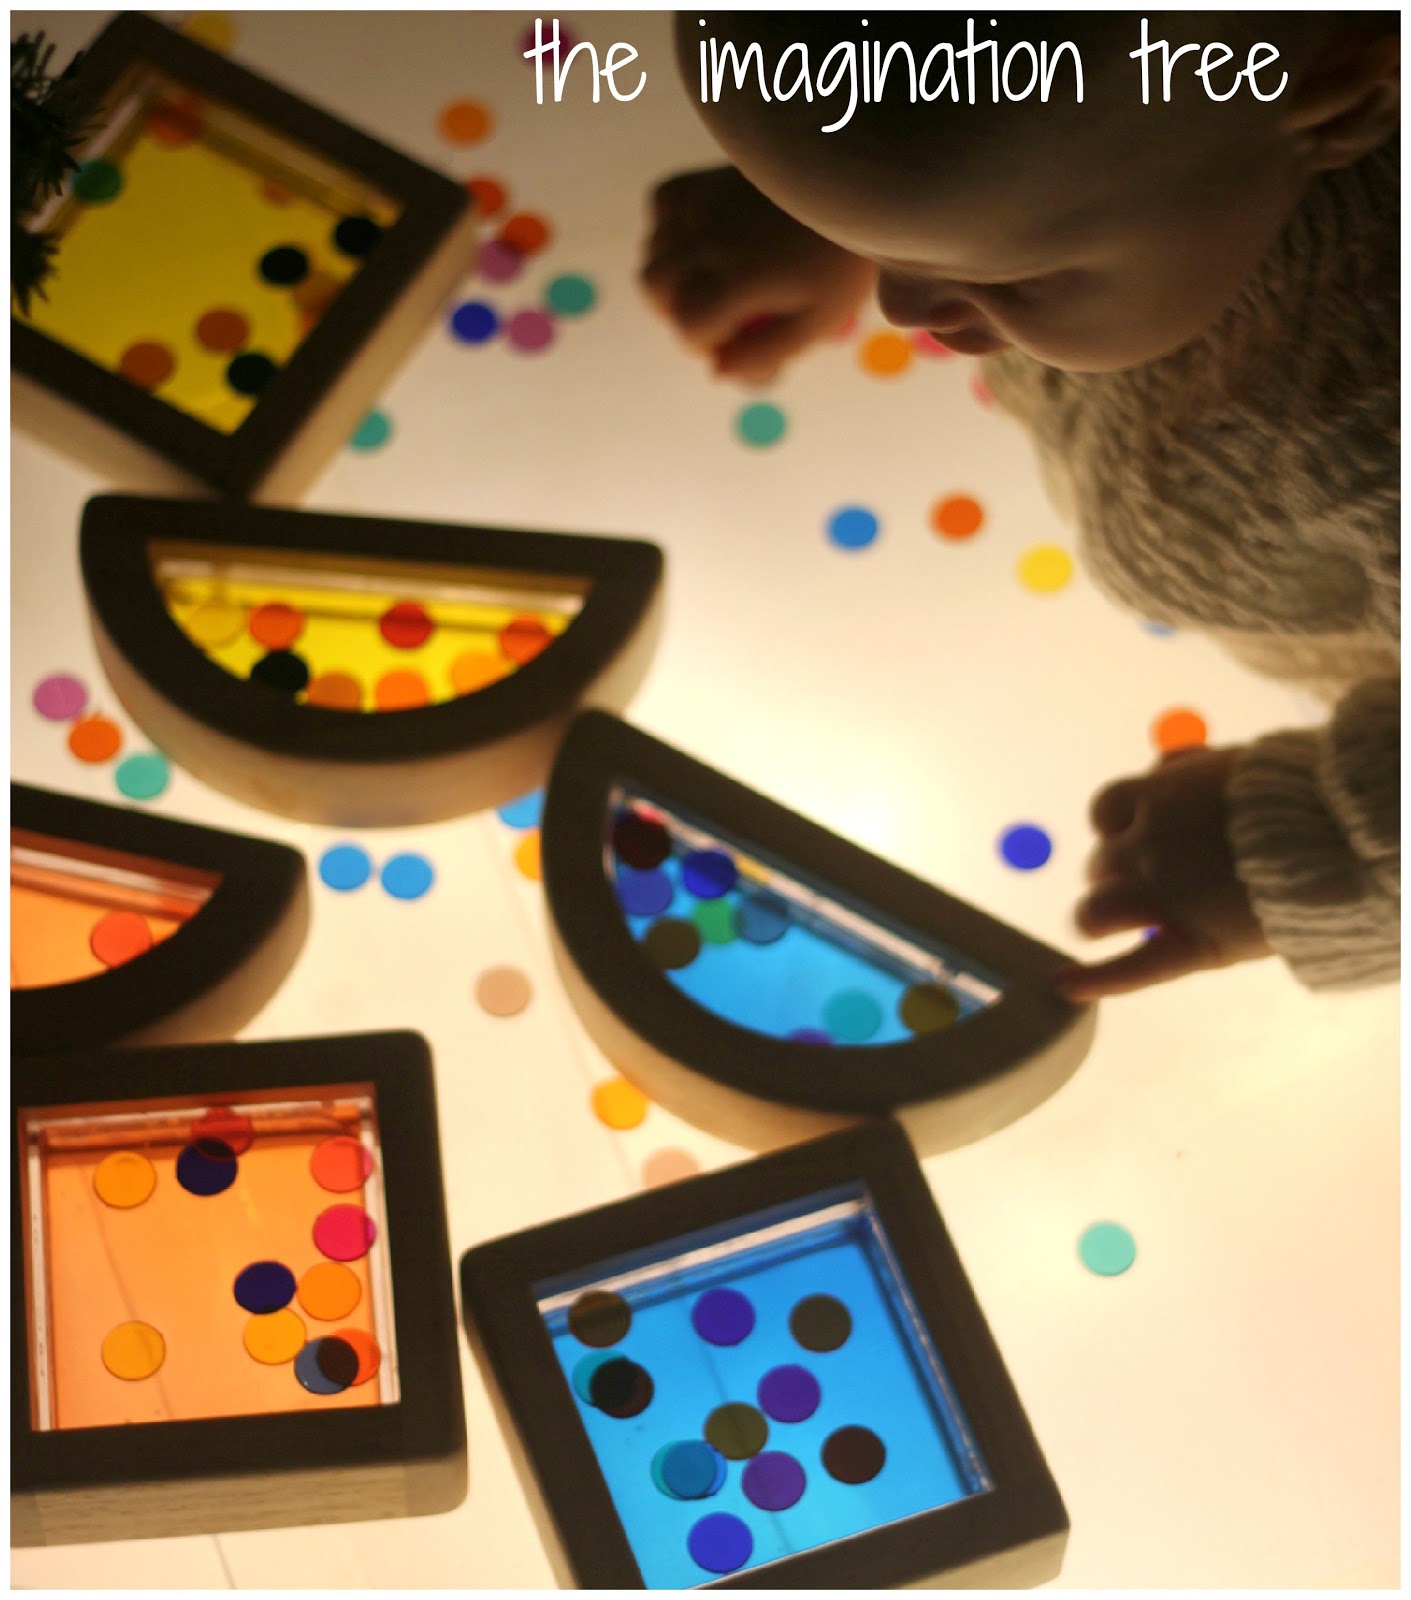
We added the gorgeous liquid colour blocks that they got for Christmas and this was the perfect way to explore them. When stacked together new colours can be made and the big girls had fun predicting which ones would combine to form which new colour.
Colour Water Blocks

Then I remembered the lovely coloured bingo chips that we have in our cupboard full of bits and pieces, and they looked gorgeous against the light. Cakie and Pop counted them, lined them up, made patterns, scooped them into cups and layered them up. Baby loved these too, and under close supervision not to eat any, she was able to use a pincer grasp to pick them up and drop them into clear plastic cups and on top of the liquid blocks. She returned to that activity all afternoon and seemed to love the sound they made as they fell!
At one point we had trapped a low branch from the Christmas tree under the box lid by mistake, and Cakie pointed out that it was making a silhouette (we’ve been looking at Winter tree silhouettes this week in nature!) I grabbed some left over tracing paper and suggested she used it to trace the outline.
She loved this new drawing activity and I think there are many exciting new things we could try together using this method. Some crafters and tattoo artists use light boxes for very similar purposes.

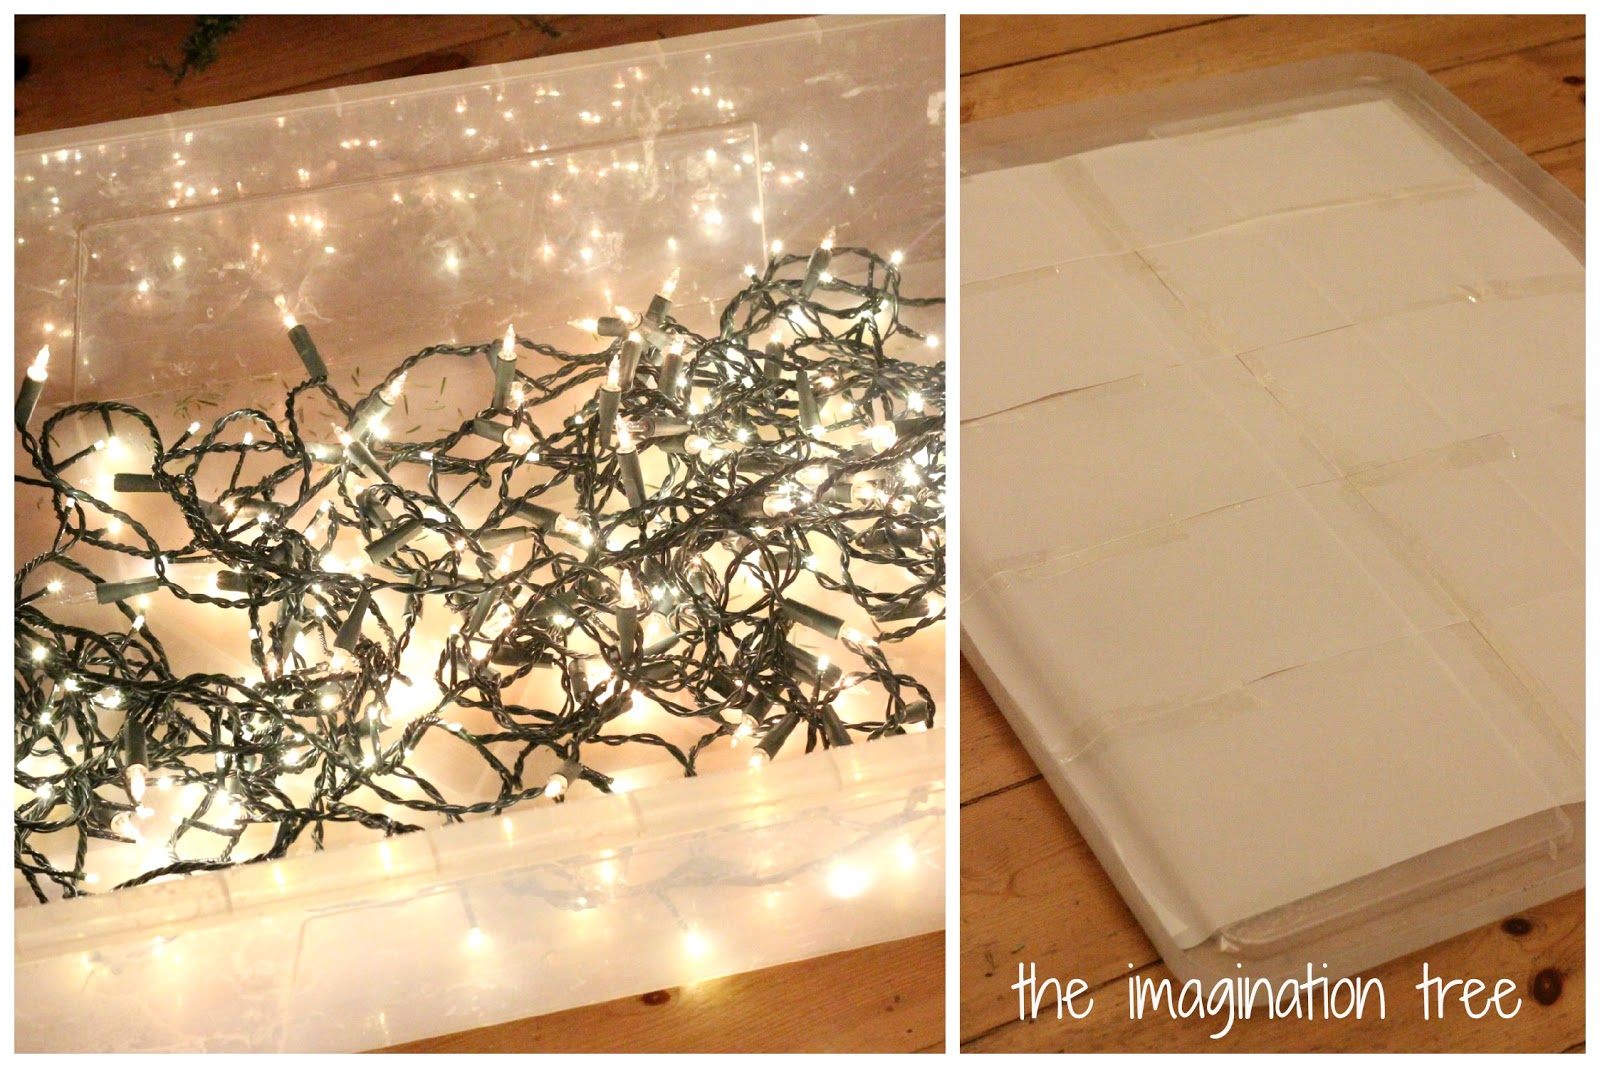
After we have finished the initial burst of play with our new toy, I will pack the lights into a bag and store them inside the box ready for another day. There are hundreds of possibilities for light box play and learning ideas and it is suitable for all ages, from babies to much older children.
What they are learning as they play:
sensory:investigating materials using all the senses
science: understanding silhouettes, shadows, light, colour mixing
maths: counting, sorting, pattern making, filling and emptying
motor skills: developing hand-eye coordination, pincer grasp, scooping, pouring, tipping, moving, stacking, balancing
This is great! Those things are so expensive in the catalogues. Thank you for sharing! Will be pinning this for future reference 🙂
This is great! Those things are so expensive in the catalogues. Thank you for sharing! Will be pinning this for future reference 🙂
a.m.a.z.i.n.g idea! will try it for sure! I love how your kids multitasking: playing, eating apples etc. I have a question though: where can I purchase these great coloured bingo chips? they can be used in sooooo may projects! Thanks for the inspiring ideas all the time. Big fan of you, Anna
i’d love a really big one like this but I can’t seem to find a nice box which has a flat lid. All ours have ripples in them 🙁 The silhouettes are nice, something you can’t really do on a regular light panel. Think I’ll keep looking for a nice flat container. It is great that it can be packed away for another day. Ours being in the cardboard cubby really means that only one person can use is at once (plus the whole sharing debacle that we have here hehe) but they might share with a large box….hmmm yep will keep looking.
I made some of these for my preschool class last year, and couldn’t find any bins with flat or transparent lids. What we ended up doing was buying flat-bottomed transparent bins with white lids, tacked the parchment paper to the inside bottom, and then flipped the whole thing upside down once the lid was on. Also lined the sides with tinfoil so the light only shines through the top. It worked really well :).
Great idea! Happy New Year btw. I’m very impressed you’re blogging so soon apres the festive season – I’m still hidden under wrapping paper and tinsel! x
how did U make this wooden thing with colourfull water?
it’s so great. love it!
What a great idea! 😀 But… were the colour water blocks a link? It’s not working. Thanks!
I love your large light box, Anna! I think you may have just inspired me to make a larger one for the hooligans to gather around. I love our little ones for individual and partner play but I like how you can really spread things out on yours. Thanks for the inspiration. Im’ heading out to do a little boxing weeks shopping today, so I’m thinking storage containers and lights will be marked down now. Thanks for mentioning us in your post! x
Did you use battery powered lights or are they plugged in? I used tissue paper and battery tea lights but would like more light.
What a brilliant idea and so simple, light boxes are so expensive and as you have proved for no good reason!
Great and simple idea !
I’ve wanted to make a light box for a long time too. We’re taking our tree down this weekend so I may just have to use your idea and make one with the Christmas lights. Thanks for the inspiration!.
It’s wonderful!!
I will be trying this tonight as I pack away the rest of our Christmas lights, thank you for sharing it’s something I too have wanted to create with my girls. Pinning onto our Playtime board too.
Love this idea! Did you have any problems with the container getting too hot?
Mine got pretty hot but only after being on continuously for a couple of hours.
Hello, I got this post in my inbox and you inspired me to get off my behind and give this a go! We did it today and my 6 year old loved it. I blogged about it too with a reference to your post, thanks for sharing, Nicole 🙂
http://mudpiesandsunshine.com/2013/01/04/diy-light-table/
What a fantastic idea – I’ve also wondered whether they would benefit J and T but I can see the possibilities. Will have to get making something
I know this is a site for children’s education but you’re a bloody genius!
Love this. Making one is on my list for 2013.
FYI your storage container is not opaque. That would be no light shining through and can’t see through it. It made me do a double take to see what your container looks like.
I too have loved these whilst being an early years teacher. It is great there are easy and cheap means of making one of these for home! Now to find an appropriate box 🙂
Genius!! What a great idea for making a light box! Yes, I have that stuff too! I never though about making my own but I love also how you can easily take it down when you are done with it so it doesn’t take up space. (We have a small house!)
Another brilliant idea! Thanks for the inspiration!
I’ve been wanting a light box for some time now, but they are so expensive! So, I made this with Baby Bear today, and he loved it! I pulled out some of my old overhead projector manipulatives, and he and Papa Bear made pictures together using the shapes. Thank you for sharing!
Oh I love this! I am definitely doing this- need to get hubby back up the loft to get the xmas lights now!!
xx
Love! We got a commercial light panel for Christmas (from my inlaws) but it is a bit on the small side… this would be the perfect size for our tot school group session this week! Thanks for sharing!
Stephanie @ http://www.two-daloo.com
Great idea and easy too! I love that all the kids could play at the same time. When I first noticed the bingo chips they looked too small (in the pic) for a little one to be playing with, so I’m glad you stated you were right there to watch. I guess that is the pediatric nurse in me.
Wonderful idea! Can’t wait to try it with my seven year old 🙂