Make this simple, vibrant and stunning Valentine’s day art for kids using this beautiful crayon melt technique!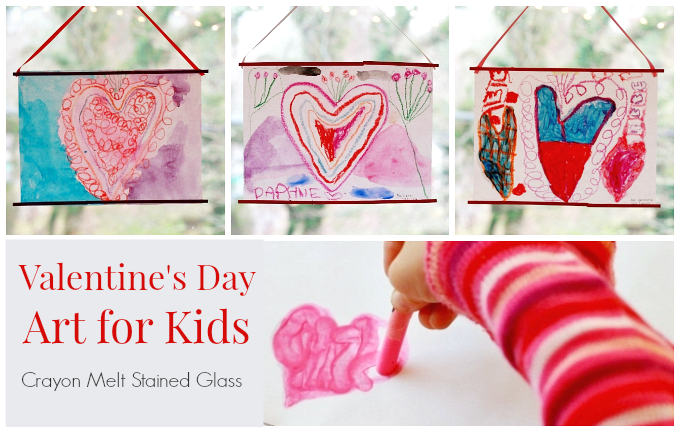
The following is a guest post from the uber talented and inspiring Jean Van’t Hul, author of The Artful Parent. Thank you Jean!
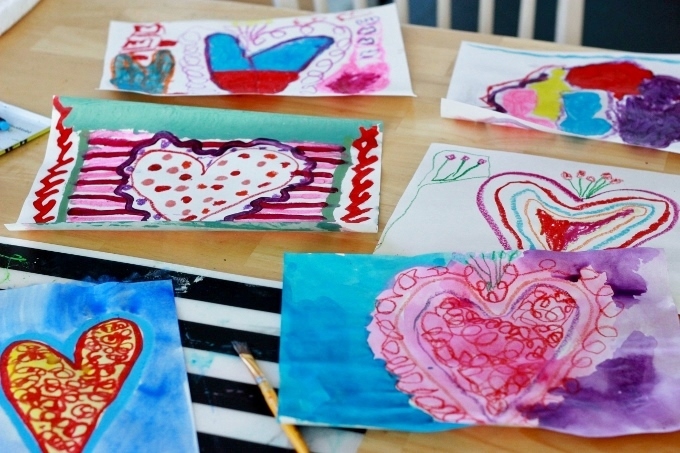
My kids love hearts and heart art any time of the year. But as we near Valentine’s Day, it’s all hearts all the time.
Any art technique or medium is fair game.
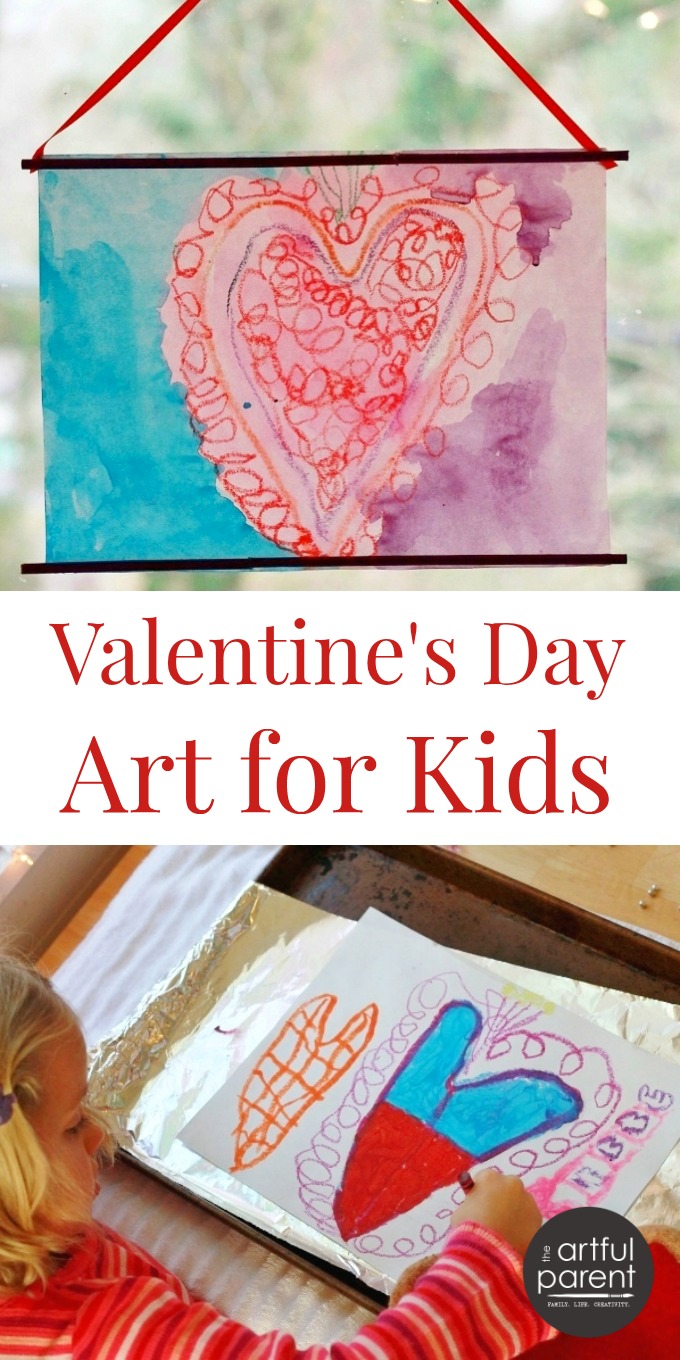
Recently, we made stained glass melts—one of our favorite art activities—and, predictably, turned them into Valentine’s.
Here’s how we did it ::
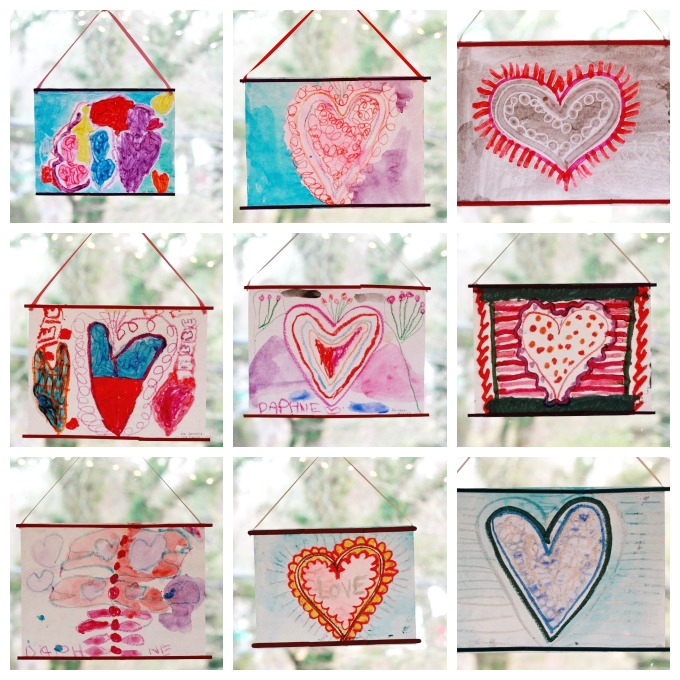
Crayon Melt Valentines Day Art for Kids
MATERIALS
- White paper, not too thick (printer/copier paper works although we tend to use something a tad thicker)
- Foil lined cookie sheet (or warming tray if you happen to have one)
- Old towel
- Oven mitt
- Crayons
- Watercolor paint (we used cakes but have used liquid watercolor paint
in the past)
- Paint brush
- Vegetable oil
INSTRUCTIONS
1. Preheat the cookie sheet in the oven at 350F. While the cookie sheet is heating up, protect your work surface by laying down an old towel, folded over.
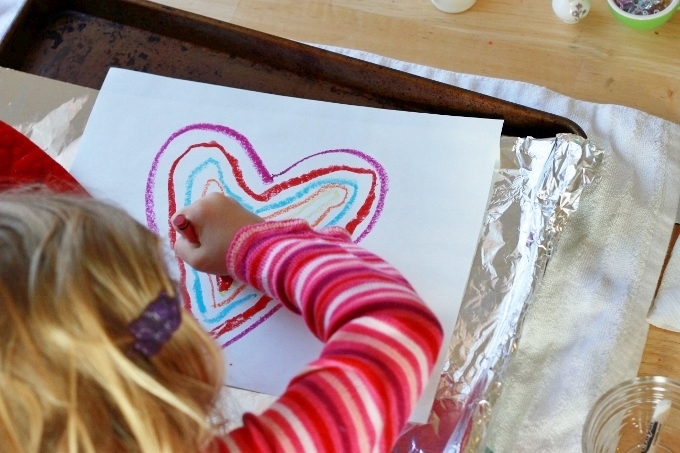
2. Set the hot cookie sheet on the towel, warn the kids about the heat, and give them an oven mitt to protect their non-dominant hand. (My 5 year old used one, my 9 year old didn’t.)
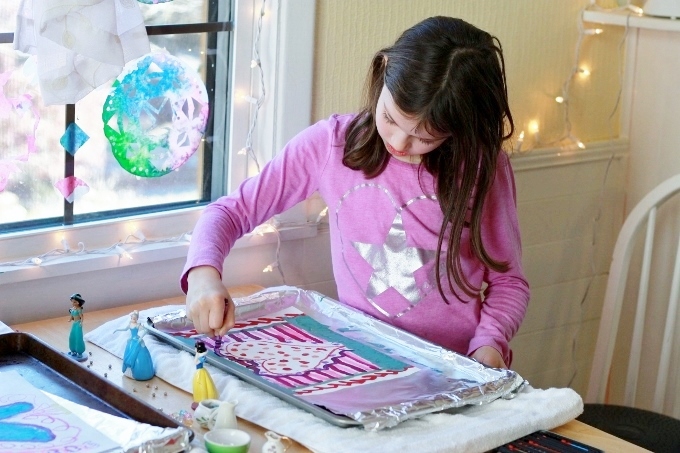
Lay a sheet of paper over the cookie sheet and draw and write on the paper with the crayons. The crayons will melt as they draw. Once the crayons stop melting, put the cookie sheet back into the oven to reheat. Repeat the drawing and reheating process as necessary.
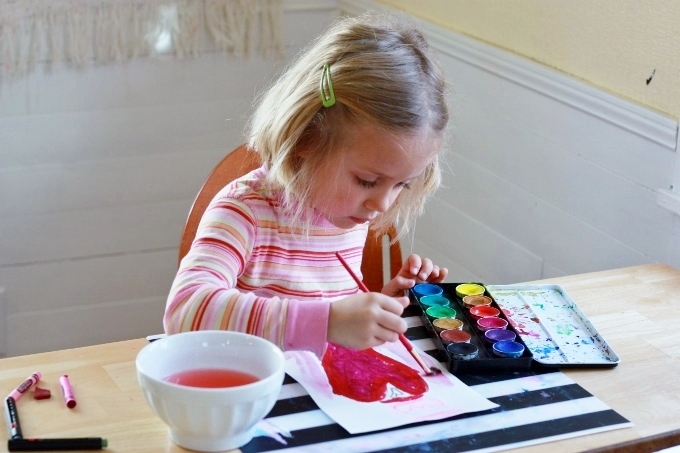
3. Paint over and around the melted crayon drawing with watercolor paints.
Let dry. Press the artwork under a heavy book to flatten if necessary (the thinner paper will curl a bit as it dries).
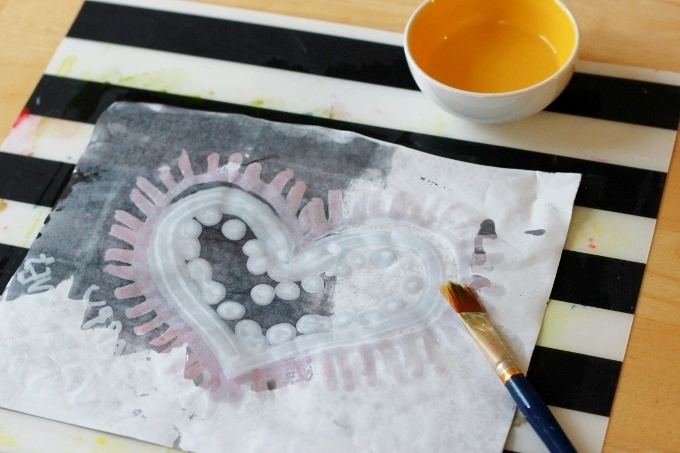
4. Paint the back of the artwork with a thin coat of vegetable oil.
The oil brightens the colors and makes the paper more translucent…
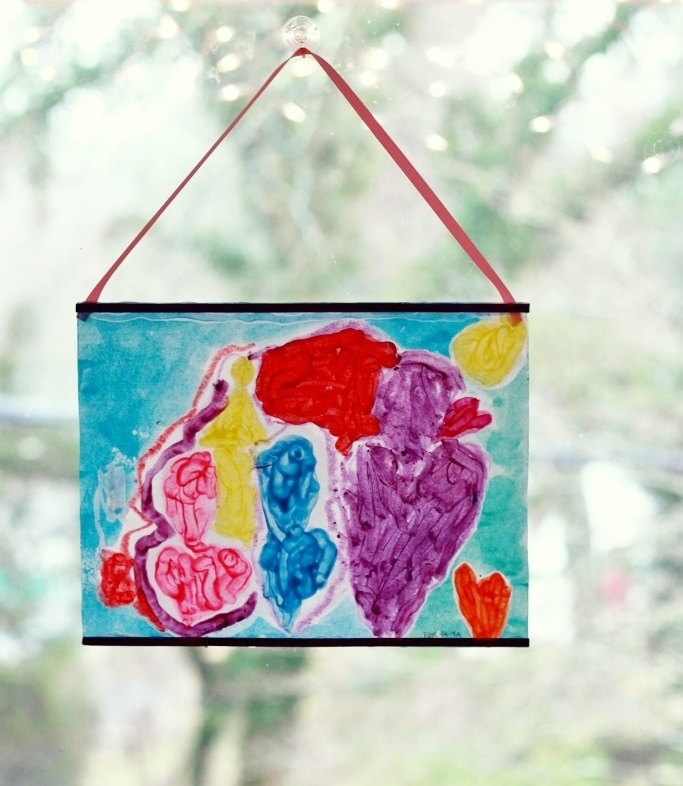
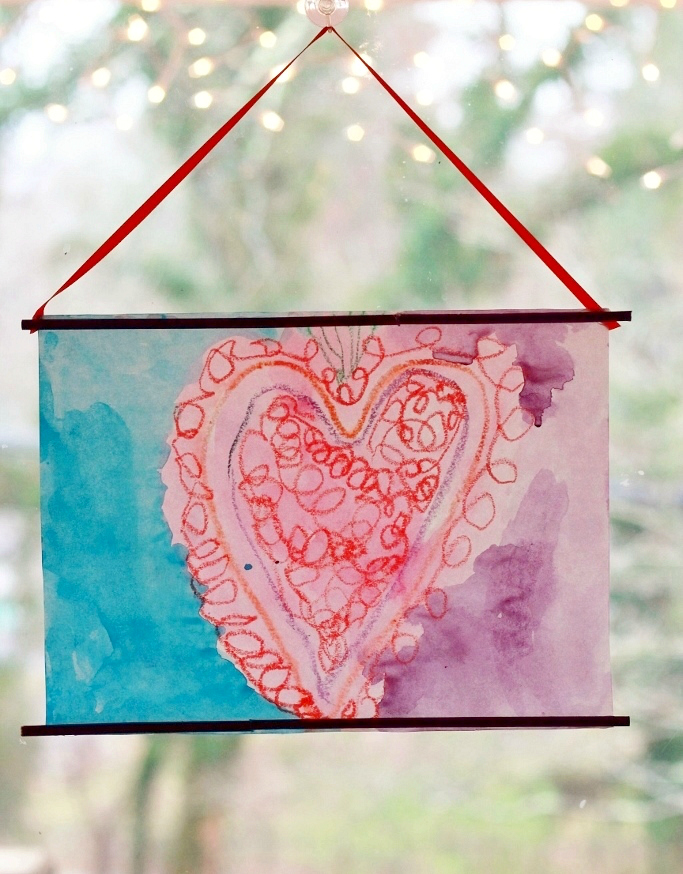
…giving it a stained glass effect when hung up to the light.
As you can see here, I ad libbed some frames for hanging our Valentine art and to give it a more finished touch as we were planning to gift these to the grandmas and other family members and friends.
I just made do with what I had on hand for our frames, but I’ll share my process and also give a couple of other ideas that would work.
I glued some painted wooden dowels to the front tops and bottoms of each artwork, using a hot glue gun to attach the thin dowel directly to the painting.
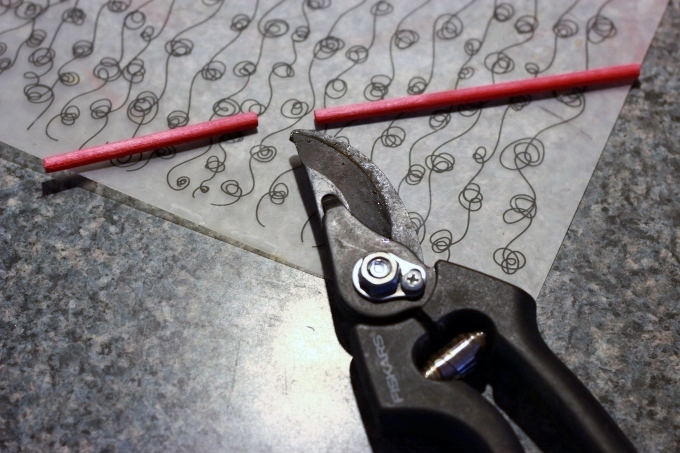
And, since each dowel wasn’t long enough on its own, I also glued on sections of other dowels (cut with pruning shears) next to the whole one. I said I ad libbed this frame thing, right?!
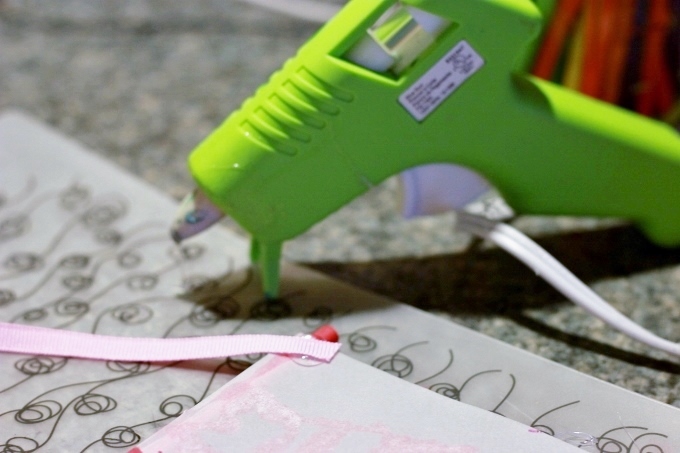
Once the dowels were attached, I turned the Valentine artwork over and glued a length of ribbon to each side of the top dowel as a way to hang the art.
It worked!

Now a couple of other ways to frame these stained glass artworks ::
1. Popsicle Stick Frames :: I also used wooden craft sticks for the frame pictured above, glueing them directly to the top and bottom of the artwork as I did with the dowels, except that I overlapped each a bit. They worked just fine, so if that’s what you have, definitely use them.
2. Cardboard Frames :: You could also cut a picture frame out of cardstock or cardboard and glue it to the front of the painting.
How about you? Have you tried melted crayon drawings yet? If not, I highly recommend giving them a go with your kids! And turning them into stained glass art that you can hang in the window or give as a gift takes the art project to a whole new level.
P.S. Here are 19 More Valentines Day Art Ideas for Kids including a painted heart doily bunting, heart-print T-shirts, and glitter rock Valentine’s.
About the Author ::
 Jean Van’t Hul is the author of two books, including The Artful Parent :: Simple Ways to Fill Your Family’s Life with Art & Creativity and The Artful Year :: Celebrating the Seasons & Holidays with Crafts & Recipes (out February 3rd).
You can find Jean sharing regularly about children’s art, creativity, and seasonal crafts on her blog, The Artful Parent.