Make a beautiful baby keepsake from salt dough to give as a special gift to family or hang on the wall!
Baby Bean is now 9 weeks old and I have been very keen to take an imprint of her hand and foot before she gets another centimetre bigger!
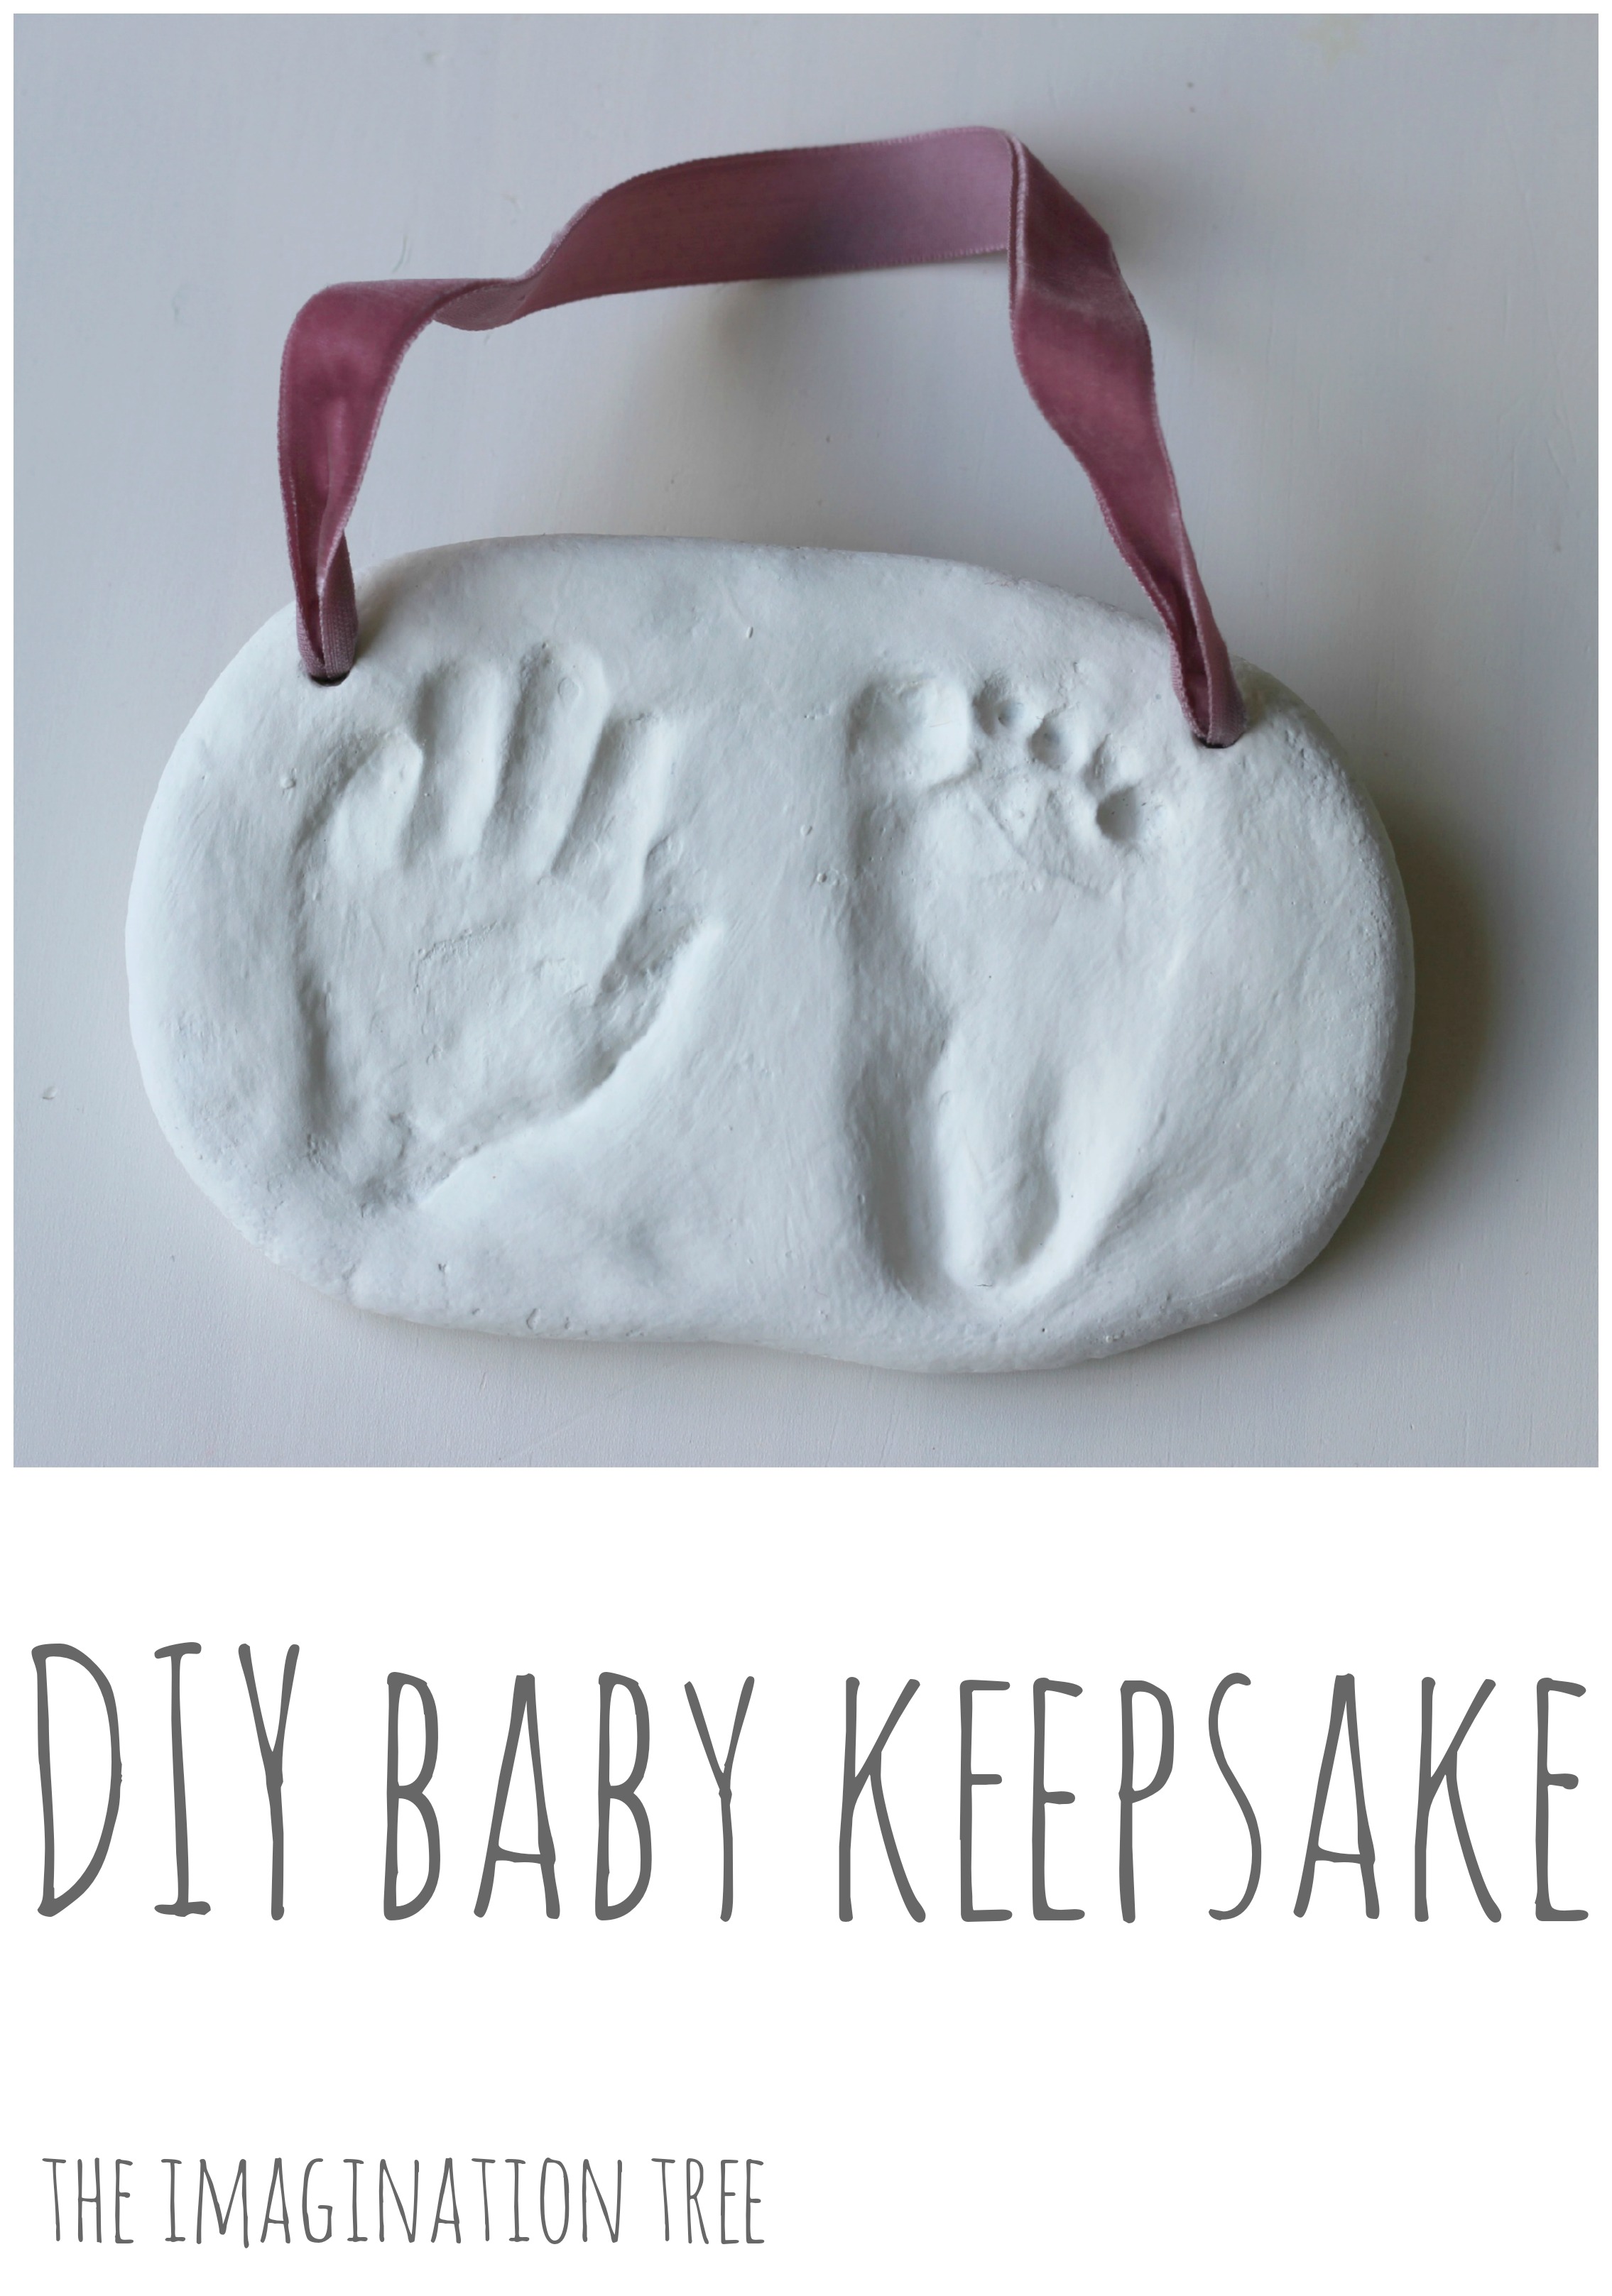
Following on from the success of the salt dough handprints and footprints we have made with the older girls in the past, I wanted to make another little plaque to hang on the wall, this time using an impression of one hand and one foot.

Salt dough is super easy and cheap to make and lasts for a very long time once cooked. The perfect modelling material!
How to make salt dough:
- 1 cup plain (all purpose) flour
- 1 cup salt
- Up to 3/4 cup water
Also needed:
- 1 well-fed, happy and rested baby! (being cute and adorable are optional extras)
Method:
Simply combine the salt and flour, then add the water gradually until it forms a dough. Knead it well for a good few minutes until it combines and the stickiness disappears. If it remains sticky add a little more flour, a tablespoon at a time. If it’s a little dry and won’t form a dough, add more water just a teaspoon at a time.
Here’s what our finished dough looks like.

Next we rolled it with a rolling pin until it was about 1-2 cm thick. It’s important not to make it too thick as it won’t cook evenly and may retain doughy patches even after hours in the oven.
I formed it into a very basic plaque type shape. You could use the base of a tupperware pot, the inside of a plate or a giant cutter to mould the shape- anything will do!

The next part was the most challenging of all to do alone, but with two people it is much easier! Gently press baby’s foot into the dough on one side, making sure to firmly press the toes so that they make a deep impression. I love how the little creases show up so clearly! ADORABLE.

Repeat with the hand on the other side of the plaque. With little babies this is tricky because they like to keep their fists curled up so tightly! Little Bean was, thankfully, very obliging and happy as we did this.
If you intend to hang it on the wall you need to make two holes using a straw, one on either side. You can thread through some raffia or ribbon once it has hardened and use it to hang it with. (No photo of this, sorry!)

As soon as it is made, transfer it to some baking paper and put it on a baking tray in the oven. In the oven it needs to dry out rather than cook, so the oven needs to be on very low (around 100 C or roughly 200 F.)
Leave them in the oven for 2-3 hours and turn once during the drying out process. If they are still doughy after 3 hours, turn off the oven and leave them in there for another 2 hours to let them harden.
Once they are cool they can be painted. We painted ours with a couple of layers of ordinary, white ready-mix paint, although acrylics looks really effective too!
Then I threaded some pink velvet ribbon through the holes and knotted it at the back. Now it is hanging on the wall in our living room, with baby’s name and the date on the back.

Another little keepsake to add to our growing collection!

Hi, I’m a new follower from Pinterest. I enjoy seeing your crafty and educational posts. Looking forward to more!
thank you!
hi! i was wondering if it was possible to double the recipe to make a bigger one or should i keep it this size??
yes certainly!
I tripled it for my dogs paw prints and it worked out wonderfully 🙂 thank you for the inspiration!
Forgot to mention it needs a bit more flour at that size!
Beautiful baby and cute craft idea! Renee
thanks Renee!
Awww how sweet! Anyone would be happy to have these as a gift :0)
so cute aren’t they!
This is gorgeous I wish I had done it with mine
definitely not too late Cerys!
These are adorable – they would make great keep sakes for Grand parents or Godparents
good idea!
Your baby is SO adorable! Great tutorial! Thank you!
thank you!
Doubled works fine 🙂
i was a bit slow to answer her wasn’t I! oops.Thanks for that 🙂
You have such amazing crafts and projects on here. I found your blog at the perfect time here in Kuwait, where the summer is heating up and indoor play ideas will be all we have to to keep busy- too hot to spend time outdoors
that’s wonderful, glad you are inspired!
what a great idea!! my daughter is making this with her newborn cousin. i have a question, when putting it in the oven, do you put the imprints up or the imprint down. thank you so much for this wonderful idea!!
Flip it over after an hour or two, so imprint up to begin with and then down
I love this crafty idea. I just had my first child and he is now 11 weeks old. I definetly want to do this. Thank you for posting
Great idea, I did this when I was little! Can you add food coloring?
Yes you can! You need quite a lot to make an intense colour
Could u use kool aid for color?
Could you put this in a tin as a keepsake? Or would it not dry all the way? Need this by sunday, lol. Daddys birthday! 🙂
sorry! I hope it worked! It needs to go in the oven really
Does anyone know if you can mix the dough up ahead of time, or does it get hard if you don’t use it right away. I want to do this as a surprise gift for my sister-in-law when I’m babysitting my niece, and it would be helpful if I could have it ready before I go there.
Yes you can, but keep it in a zip loc or sealed jar and use within a few day. If it’s left out it will harden faster than play dough
Can you please tell me if this dough could be used to do othr rafts or is it just for this craft? Thanks
Awwww so sweet, please visit my site! http://saltdough.weebly.com/
Anyway to add food coloring to make colorful?
I received one of these for Christmas and it is still soft on the back. it has a glaze on the front.
should we try more oven time? Should we air dry it ? Or is it going to spoil somehow since its still a soft dough…?